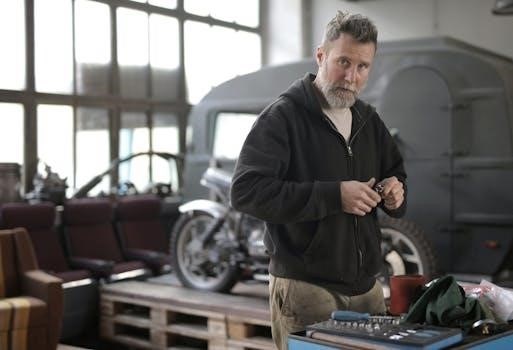
365 dias de placer libro pdf

365 Días de Placer: Exploración del Libro PDF

Discover a fascinating book designed for couples seeking to explore their intimate lives in a unique and exciting way. This book is in PDF format and has illustrations.

Sinopsis y Temática Principal

“365 Días de Placer” is a captivating book, ideally suited for couples who want to ignite their passion and delve into new depths of intimacy. Presented as a calendar, the book offers a carefully curated collection of Kamasutra positions, one for each day of the year. Its primary theme revolves around enhancing sexual variety and excitement within a relationship. It also guides you through a sensual journey filled with exploration, encouraging couples to discover new ways to connect and experience pleasure together. The book features detailed illustrations and clear descriptions.

Kamasutra: Posturas Ilustradas para Cada Día

The book features exquisitely illustrated Kamasutra positions. There are 365 in total, one for each day of the year. It provides multiple benefits that will enrich the couple’s relationship.

Variedad y Estimulación Sexual

This guide offers many ideas to vary and experiment with your spouse or partner. This is a calendar that offers a small piece of advice for every day of the year on where and how to do it to enjoy sex to the fullest. From classic positions to more daring and creative ones, the book offers a wide range of options. The aim is to ignite passion and connection with your partner. The detailed illustrations and descriptions guide you through a sensual journey full of exploration and discovery, promising ultimate pleasure.

Beneficios para la Pareja: Intimidad y Pasión

This book transforms the intimate lives of couples by providing 365 positions, one for each day. It is an exciting guide that will revitalize the intimate life.

Revitalización de la Relación

This book offers multiple benefits that will enrich and ignite the relationship. It guides you through a sensual journey filled with exploration and discovery. From classic to daring positions, it ignites passion and connection. It is a fascinating book designed for couples who seek to explore their intimate lives in a unique and exciting way. This book provides a technique to achieve pleasure. This guide will entertain and excite, ensuring couples achieve maximum understanding. With this guide, couples will never make love the same way twice.

Trilogía 365 DNI: La Novela de Blanka Lipińska

The trilogy “365 DNI” by Blanka Lipińska is a bestseller. It is a story filled with twists. One character will give 365 days to love and stay.

Adaptación a Netflix y Éxito Internacional

The novel inspired a global phenomenon aired by Netflix, an exciting story of high-voltage sex, luxury, and power. It has achieved international success, captivating audiences worldwide with its explicit content and dramatic storyline. The series delves into the passionate relationship between Massimo and Laura, exploring themes of obsession and desire. The adaptation has sparked both praise and criticism for its portrayal of controversial themes. Despite divided opinions, the Netflix adaptation has solidified the trilogy’s place in popular culture, reaching a vast and diverse audience. The show’s popularity has also boosted the book’s sales and recognition globally.

Guía Ilustrada: Técnicas y Posturas Sexuales

This guide provides illustrated techniques for enhancing sexual pleasure. It covers romantic postures, G-spot stimulation, and various oral sex techniques. It also explores prostate and female orgasm techniques.

Estimulación de Puntos Erógenos

The illustrated guide delves into the art of stimulating erogenous zones, unlocking pathways to heightened pleasure. Focusing on sensitivity and responsiveness, the book offers techniques to ignite passion. Explore methods for both partners, enhancing intimacy and connection through sensual touch. Discover the secrets to maximizing pleasure by targeting specific areas. From gentle caresses to more intense stimulation, the guide provides a comprehensive approach to exploring erogenous zones. Unlock the potential for deeper intimacy and shared pleasure through targeted and mindful touch. Learn how to communicate desires and preferences, creating a mutually satisfying experience.

Disponibilidad del Libro: Formatos y Dónde Encontrarlo

The book is available in PDF format for download. Find it on popular online bookstores and platforms. Explore sensual discovery today! Get your copy and enjoy.

Opciones de Compra y Descarga

Explore the various avenues to acquire “365 Días de Placer.” Many online bookstores offer the book in digital PDF format, allowing for immediate download and access on your preferred devices. Check retailers like Amazon, Casa del Libro México, and others for availability and pricing. Some platforms may also offer free samples or excerpts to preview the content before purchasing.

Additionally, consider searching for the title on websites specializing in digital book distribution. Ensure that you are downloading from reputable sources to avoid copyright infringement and potential malware. Enjoy exploring the sensual journey that awaits!

Exploración y Descubrimiento Sensual

Embark on a sensual journey filled with exploration and discovery as you delve into the pages of “365 Días de Placer.” This guide will help you unlock the depths of passion.

Viaje Erótico en Pareja

Embark on an exciting erotic journey with your partner, guided by the sensual wisdom within “365 Días de Placer.” This book will transform your intimate connection, offering a diverse range of experiences to ignite passion and deepen intimacy. Explore new realms of pleasure together, as you discover hidden desires and unlock untapped potential for sexual fulfillment. Each page invites you to embrace vulnerability, communication, and playful exploration, fostering a stronger bond between you and your loved one. Let this book be your compass, navigating you through a landscape of shared ecstasy and unforgettable moments, creating a lasting legacy of love and desire.

Recepción y Críticas del Libro

Explore the reception and critiques surrounding this transformative book, examining its impact on intimate lives. Discover insights into how readers have revitalized their relationships and ignited passion.

Impacto en la Vida Íntima

The book “365 Días de Placer” is designed to transform the intimate lives of couples, offering 365 exquisitely illustrated Kamasutra positions. These positions, one for each day of the year, provide multiple benefits. The book enriches and revives relationships, serving as a comprehensive and passionate guide. It helps couples discover exciting ways to ignite passion and connection.

With detailed illustrations and clear descriptions, it guides couples through a sensual journey. This journey is filled with exploration and discovery, enhancing intimacy and creating unforgettable experiences. The book offers a wide range of options to spice up their love life.

ryobi 3716 manual

Ryobi RY3716 Manual⁚ A Comprehensive Guide

Welcome to a comprehensive guide dedicated to the Ryobi RY3716 chainsaw. This resource provides users with valuable information, covering everything from key features and safety instructions to maintenance, repair resources, and part locations.

The Ryobi RY3716 chainsaw is designed for homeowners and professionals alike, offering a blend of power and affordability. With a 37cc 2-cycle engine, it provides ample power for various cutting tasks around the yard. Its lightweight design ensures ease of use, while features like the anti-vibration handle enhance comfort during extended operation. The automatic oiler prolongs the life of the bar and chain, and the tool-free air filter cover simplifies maintenance; Safety features, including the inertia-activated chain brake and Safe-T-Tip, prioritize user protection. This guide provides comprehensive information to help you use and maintain your Ryobi RY3716 effectively.

Key Features and Specifications

The Ryobi RY3716 chainsaw is equipped with a 37cc 2-cycle engine, delivering reliable power for various cutting tasks. It features a 16-inch bar length, suitable for felling small trees and limbing branches. The anti-vibration handle enhances user comfort during extended use, while the automatic oiler ensures continuous lubrication of the bar and chain. A tool-free air filter cover simplifies maintenance, and the side-access chain tensioner allows for quick adjustments. Safety features include an inertia-activated chain brake and a Safe-T-Tip. This chainsaw combines power, convenience, and safety, making it an ideal choice for homeowners and professionals.

Engine Power and Bar Length

The Ryobi RY3716 chainsaw is powered by a robust 37cc 2-cycle engine, designed to provide ample power for various cutting applications. This engine ensures efficient performance when tackling tasks such as cutting firewood, pruning trees, and clearing brush. Complementing the engine is a 16-inch bar, which offers a balance between maneuverability and cutting capacity. This bar length is well-suited for both smaller limbs and larger diameter logs, making the RY3716 a versatile tool for homeowners and professionals alike. The combination of engine power and bar length ensures optimal cutting efficiency.

Anti-Vibration Handle and Automatic Oiler

The Ryobi RY3716 chainsaw is equipped with an anti-vibration handle, significantly reducing user fatigue during prolonged use. This feature enhances comfort and control, allowing for more precise and safer operation. Additionally, the chainsaw features an adjustable automatic oiler, which continuously lubricates the bar and chain during operation. This automatic oiler minimizes friction, extends the life of the bar and chain, and ensures smooth cutting performance. The combination of the anti-vibration handle and automatic oiler makes the Ryobi RY3716 a user-friendly and efficient tool for a variety of cutting tasks, promoting both comfort and longevity.

Safety Features⁚ Chain Brake and Safe-T-Tip

The Ryobi RY3716 chainsaw prioritizes user safety with essential features like a chain brake and Safe-T-Tip. The inertia-activated chain brake immediately stops the chain’s movement in the event of kickback, reducing the risk of injury. This crucial feature provides an extra layer of protection during operation. Complementing the chain brake, the Safe-T-Tip is designed to prevent rotational kickback, further enhancing user safety. These safety mechanisms demonstrate Ryobi’s commitment to providing tools that minimize risks and ensure a safer working environment for homeowners and professionals alike when utilizing the RY3716 chainsaw.

Finding and Downloading the Ryobi RY3716 Manual

Locating the Ryobi RY3716 chainsaw manual is a straightforward process. Start by visiting the official Ryobi website, where you can access a comprehensive library of manuals for their products. Navigate to the “Support” section and look for the “Manuals” page. Here, you can search for the RY3716 manual by entering the model number in the search bar. Alternatively, browse through the product categories to find the chainsaw section and locate the RY3716. Once found, you can download the manual in PDF format for easy access;

Manual Contents⁚ Operation and Safety Instructions

The Ryobi RY3716 manual is a crucial resource for safe and effective chainsaw operation. It comprehensively covers essential information, including step-by-step instructions for starting and stopping the chainsaw, ensuring user familiarity with its operation. Safety is paramount, and the manual details critical precautions to prevent accidents, such as wearing appropriate safety gear and maintaining a safe working distance. Furthermore, it guides users on proper handling techniques and chain brake operation. Understanding these safety guidelines is essential for responsible chainsaw operation and injury prevention, making the manual an indispensable tool.

Starting and Stopping the Chainsaw

The Ryobi RY3716 manual offers precise guidance on safely starting and stopping the chainsaw. It details the correct procedures, including priming the engine and engaging the choke for a smooth start. Safety interlocks and proper grip techniques are emphasized to prevent accidental starts. The manual also explains various stopping methods, such as using the on/off switch and engaging the chain brake for immediate halts in emergencies. Mastering these starting and stopping procedures is crucial for user safety and extending the chainsaw’s lifespan. Consulting the manual ensures correct operation and reduces the risk of accidents.

Adjusting Chain Tension and Maintenance

Maintaining optimal chain tension is crucial for the Ryobi RY3716 chainsaw’s performance and safety, as detailed in the operator’s manual. The manual provides step-by-step instructions on how to adjust chain tension using the side-access tensioner. Regular chain maintenance, including sharpening the cutters at the correct angles, is also covered. Proper filing angles for both the top and side plates are explained to ensure efficient cutting. The manual emphasizes the importance of inspecting the chain for damage and lubricating it regularly. Neglecting chain tension and maintenance can lead to reduced cutting efficiency and potential safety hazards.

Carburetor Adjustment and Troubleshooting

The Ryobi RY3716 manual offers detailed guidance on carburetor adjustment to ensure optimal engine performance. It includes instructions for adjusting the idle speed screw, as improper settings can affect chainsaw operation. Troubleshooting tips are provided to address common issues such as difficulty starting or poor engine performance. The manual advises users to consult the carburetor adjustment section if the chainsaw is not running smoothly. It warns about the dangers of improper adjustments and recommends seeking professional assistance if needed. Understanding the carburetor settings is crucial for maintaining the chainsaw’s efficiency and prolonging its lifespan, as noted in the guide.

Maintenance and Repair Resources

The Ryobi RY3716 manual contains valuable resources for maintaining and repairing your chainsaw. It guides users to replacement part stores, which are essential for sourcing original components. Authorized service centers are available for professional assistance, offering expertise in diagnosing and fixing issues. For quick repairs, Ryobi provides a Rapid Repair program, ensuring a fast turnaround. Registering your product unlocks additional support and warranty benefits. The manual also highlights the availability of online resources, including user guides and FAQs. By utilizing these maintenance and repair resources, owners can extend the life of their Ryobi RY3716 chainsaw.

Replacement Parts and Service Centers

When your Ryobi RY3716 chainsaw requires maintenance or repair, locating the correct replacement parts is crucial. The official Ryobi parts store is your primary source for genuine components, ensuring compatibility and optimal performance. In addition to replacement parts, Ryobi provides access to authorized service centers staffed by trained technicians. These service centers offer expert diagnostic and repair services, ensuring your chainsaw is running smoothly. Refer to the Ryobi website or manual for a directory of authorized service centers near you. Using genuine replacement parts and professional service centers helps maintain the longevity and efficiency of your Ryobi RY3716.

Rapid Repair Program

For convenient and expedited service, Ryobi offers the Rapid Repair program, designed to minimize downtime for your RY3716 chainsaw. This program provides a streamlined repair process with a quick turnaround time, typically around 14 days. To utilize the Rapid Repair program, you can visit the Ryobi website or contact customer support for instructions on how to send in your chainsaw. Once received, Ryobi technicians will diagnose and repair your tool, ensuring it’s returned to you in optimal working condition. This program is a valuable resource for getting your Ryobi RY3716 back in action promptly.

Registering Your Ryobi Product

Registering your Ryobi RY3716 chainsaw is a crucial step to unlock various benefits and ensure you receive the best possible support. By registering, you can activate your warranty, providing coverage for potential defects or malfunctions. Registration also allows Ryobi to keep you informed about product updates, safety recalls, and exclusive offers. You can easily register your product online through the Ryobi website, where you’ll need to provide some basic information such as your name, address, purchase date, and the model number of your chainsaw. Registering your Ryobi RY3716 is a simple process.

Where to Buy Ryobi Tools and Manuals

Finding Ryobi tools and manuals, including the RY3716 chainsaw manual, is straightforward with several options available. Major retailers like Home Depot and Lowe’s often carry a wide selection of Ryobi products, both in-store and online. You can also explore online marketplaces such as Amazon and eBay for new and used Ryobi tools and manuals. For official Ryobi manuals and parts, the Ryobi website is the best resource. Local authorized service centers are another place to check, as they may have manuals or be able to order them for you.

moultrie game camera instructions manual

Moultrie Game Camera Instructions Manual⁚ A Comprehensive Guide

Embark on your wildlife observation journey with confidence using this comprehensive guide to your Moultrie game camera! This manual serves as your all-in-one resource‚ providing clear‚ step-by-step instructions for setup‚ operation‚ and maintenance. Whether you’re a seasoned hunter or a nature enthusiast‚ this guide will help unlock the full potential of your Moultrie camera.

Moultrie game cameras have revolutionized the way we observe and interact with wildlife. These rugged‚ weather-resistant devices are designed to capture images and videos of animals in their natural habitat‚ providing valuable insights for hunters‚ researchers‚ and nature enthusiasts alike. From scouting locations to monitoring animal behavior‚ Moultrie cameras offer a discreet and effective way to gather information; Moultrie was the first company to introduce a cellular game camera‚ revolutionizing scouting technology.

With a legacy of innovation and a commitment to user-friendly design‚ Moultrie has become a trusted name in the world of trail cameras. Their cameras are known for their ease of use‚ reliable performance‚ and innovative features. Whether you’re tracking deer movement‚ monitoring your property‚ or simply curious about the wildlife in your area‚ a Moultrie game camera can help you capture those exciting moments.

Moultrie offers a wide range of models to suit different needs and budgets. From basic‚ entry-level cameras to advanced cellular models‚ there’s a Moultrie camera for everyone. Understanding the features and capabilities of your specific model is essential for maximizing its performance and capturing the best possible images and videos.

Understanding Your Moultrie Camera Model

Before diving into the setup and operation of your Moultrie game camera‚ it’s crucial to familiarize yourself with the specific features and functionalities of your particular model. Moultrie offers a diverse range of cameras‚ each designed with unique capabilities to cater to various needs and preferences.

Start by identifying the model number‚ typically found on the camera’s housing or packaging. Once you have the model number‚ consult the user manual for detailed specifications and instructions. The manual will provide valuable information about the camera’s image resolution‚ video recording capabilities‚ trigger speed‚ detection range‚ and other key features.

Pay close attention to the camera’s power requirements‚ including the type and number of batteries needed. Different models may use different battery configurations‚ so it’s important to use the correct type to ensure optimal performance and longevity.

Also‚ familiarize yourself with the camera’s external components‚ such as the lens‚ infrared flash‚ motion sensor‚ and memory card slot. Understanding the location and function of each component will help you operate the camera effectively and troubleshoot any issues that may arise.

Initial Setup⁚ Batteries and SD Card

The first crucial step in preparing your Moultrie game camera for action is the proper installation of batteries and an SD card. These components are essential for powering the camera and storing the captured images and videos.

Begin by selecting high-quality AA batteries‚ ensuring they are fresh and of the recommended type for your specific camera model. Refer to your camera’s manual for the exact battery specifications. Open the battery compartment and carefully insert the batteries‚ paying close attention to the polarity markings (+ and -) to ensure correct alignment.

Next‚ choose a compatible SD card with sufficient storage capacity for your needs. Moultrie cameras typically support SD cards up to a certain size‚ so consult your manual for the maximum supported capacity. Insert the SD card into the designated slot‚ making sure it clicks into place securely.

Before using the SD card‚ it’s recommended to format it using the camera’s built-in formatting function. This will ensure optimal compatibility and performance. To format the SD card‚ navigate to the camera’s menu and select the “Format SD Card” option. Follow the on-screen prompts to complete the formatting process.

Mounting Your Moultrie Game Camera

Properly mounting your Moultrie game camera is critical for capturing the best possible images and videos. A secure and well-positioned camera will ensure stable footage and optimal coverage of your target area. Several mounting options are available‚ each with its own advantages.

One common method involves using the included strap to attach the camera to a tree or post. Thread the strap through the slots on the back of the camera and securely fasten it around the chosen object. Ensure the camera is level and facing the desired direction. Adjust the strap as needed to achieve the optimal angle.

Another option is to use a mounting bracket or tripod. These accessories provide a more stable and versatile mounting solution. Attach the bracket to the back of the camera and then secure it to a tree‚ post‚ or tripod. This method allows for greater flexibility in camera placement and angle adjustment.

When selecting a mounting location‚ consider factors such as the camera’s detection range‚ the target area‚ and the surrounding environment. Avoid placing the camera in direct sunlight or areas with excessive vegetation‚ as these can interfere with image quality and trigger false detections.

Navigating the Camera’s Menu

Understanding how to navigate your Moultrie game camera’s menu is crucial for customizing its settings and optimizing performance. The menu system allows you to adjust various parameters‚ such as image resolution‚ video length‚ trigger sensitivity‚ and time-lapse intervals. Familiarizing yourself with the menu structure will enable you to tailor the camera to your specific needs and preferences.

Typically‚ accessing the menu involves pressing the “Menu” or “Mode” button on the camera. This will bring up a list of options‚ which you can scroll through using the up and down arrow buttons. Once you’ve selected the desired option‚ press the “OK” or “Enter” button to access its settings.

Within each menu option‚ you can use the arrow buttons to adjust the settings and then press “OK” to save your changes. Be sure to consult your camera’s user manual for detailed explanations of each setting and its impact on performance. Some common menu options include “Image Size‚” “Video Length‚” “Trigger Speed‚” “Detection Range‚” and “Time-Lapse Mode.”

Take some time to explore the menu system and experiment with different settings to find what works best for your specific hunting or wildlife observation needs. With a little practice‚ you’ll become proficient at navigating the menu and customizing your camera’s performance.

Setting the Date and Time

Accurately setting the date and time on your Moultrie game camera is essential for proper image and video organization and analysis. This information is typically displayed on each captured image or video‚ allowing you to track when events occurred and easily sort your files. Incorrect date and time settings can lead to confusion and make it difficult to analyze your data effectively.

To set the date and time‚ navigate to the “Date/Time” option within the camera’s menu. You will typically be presented with fields for the year‚ month‚ day‚ hour‚ and minute. Use the arrow buttons to adjust each field to the correct value‚ and then press the “OK” or “Enter” button to save your changes.

Some Moultrie cameras may also offer the option to choose between a 12-hour or 24-hour time format. Select the format that you prefer. It’s a good practice to double-check the date and time settings after making changes to ensure that they are accurate.

Consider setting a reminder to periodically check and update the date and time‚ especially after changing the batteries or if the camera has been inactive for an extended period. Keeping the date and time accurate will greatly enhance the organization and analysis of your captured images and videos‚ providing valuable insights into wildlife activity.

Configuring Image and Video Settings

Tailoring the image and video settings on your Moultrie game camera is crucial for capturing the desired quality and type of media. These settings allow you to optimize the camera’s performance for specific environments and monitoring goals. Understanding and adjusting these settings will significantly impact the clarity‚ detail‚ and storage capacity of your captured data.

Within the camera’s menu‚ you’ll find options to adjust image resolution‚ video resolution‚ and the number of photos taken per trigger. Higher image resolutions capture more detail but require more storage space. Video resolution similarly affects quality and file size. The number of photos per trigger determines how many images are captured each time the camera detects motion‚ offering varying levels of detail for each event.

Consider the lighting conditions of your monitoring area. For areas with low light‚ you may want to increase the image resolution or enable infrared flash settings to enhance visibility. In well-lit areas‚ lower resolutions may suffice‚ conserving storage space.

Experiment with different settings to find the optimal balance between image/video quality and storage capacity. Regularly review your captured media to assess the effectiveness of your settings and make adjustments as needed. Properly configured image and video settings will ensure you gather valuable data tailored to your specific monitoring needs.

Understanding Trigger Speed and Detection Range

Trigger speed and detection range are two critical specifications that significantly impact the performance of your Moultrie game camera. Understanding how these features work and how to optimize them for your specific needs is essential for capturing the desired images and videos.

Trigger speed refers to the time it takes for the camera to capture an image or begin recording video after motion is detected. A faster trigger speed ensures that you capture subjects as they enter the camera’s field of view‚ minimizing the chance of missing crucial moments. Slower trigger speeds may result in capturing only the tail end of an event as the subject moves out of range.

Detection range‚ on the other hand‚ describes the distance at which the camera can detect motion. A longer detection range allows you to monitor a wider area‚ but it may also increase the number of false triggers caused by movement outside the area of interest. A shorter detection range reduces false triggers but limits the area being monitored.

Several factors can affect trigger speed and detection range‚ including ambient temperature‚ the size and speed of the subject‚ and the camera’s settings. Experiment with different settings and placement to find the optimal balance between these two features for your specific monitoring needs. Consider the environment and the typical behavior of the subjects you are monitoring when making adjustments.

Using the Test Mode

The test mode on your Moultrie game camera is an invaluable tool for ensuring proper setup and functionality before deploying it in the field. This mode allows you to simulate real-world conditions and verify that the camera is capturing images or videos as expected‚ without wasting battery life or SD card space.

Activating the test mode typically involves navigating to a specific menu option within the camera’s settings. Once activated‚ the camera will enter a state where it is highly sensitive to motion‚ allowing you to easily trigger it by walking in front of the lens. After triggering‚ the camera will quickly capture an image or video‚ which you can then review on the camera’s screen to assess image quality‚ framing‚ and detection range.

Using the test mode‚ you can fine-tune the camera’s position‚ angle‚ and settings to achieve the desired results. You can experiment with different sensitivity levels‚ detection zones‚ and trigger delays to optimize the camera’s performance for your specific monitoring needs. It’s also a great way to confirm that the date and time are set correctly‚ ensuring accurate timestamps on your captured media.

Remember to deactivate the test mode before leaving the camera unattended‚ as prolonged use in this mode can drain the battery. By thoroughly testing your camera before deployment‚ you can avoid common issues and maximize your chances of capturing valuable data.

Troubleshooting Common Issues

Even with careful setup‚ you may encounter occasional issues with your Moultrie game camera. This section addresses some common problems and provides troubleshooting steps to help you resolve them quickly and efficiently.

Camera Not Powering On⁚ First‚ ensure that the batteries are fresh‚ correctly installed with the proper polarity‚ and of the recommended type. Low battery power is a frequent culprit. Next‚ check for any corrosion or damage to the battery contacts. If the camera still doesn’t power on‚ try a different set of batteries from a different manufacturer.

No Images or Videos Captured⁚ Verify that an SD card is inserted and properly formatted. The camera’s menu usually has a format option. Also‚ ensure that the camera is not set to “off” or “test” mode. Check the sensitivity settings to ensure they’re appropriate for the environment. Obstructions in front of the lens can also prevent triggering.

Poor Image Quality⁚ Clean the lens with a soft‚ lint-free cloth. Ensure that the camera is positioned away from direct sunlight or other sources of glare. Adjust image resolution settings within the camera’s menu. Consider the ambient lighting conditions; night images may require adjusting the IR flash intensity.

Incorrect Date/Time Stamps⁚ Double-check the date and time settings in the camera’s menu and correct if necessary. Batteries dying can reset this.

If these steps don’t resolve the issue‚ consult the Moultrie website for additional support resources or contact their customer service team.

Moultrie Mobile Setup and Activation

Unlocking the remote monitoring capabilities of your Moultrie game camera through Moultrie Mobile requires a straightforward setup process. This section guides you through activating your camera and connecting it to the Moultrie Mobile network.

Account Creation⁚ Begin by creating a Moultrie Mobile account through the Moultrie Mobile website or the dedicated mobile app. You’ll need to provide your contact information and choose a subscription plan that suits your needs. Consider the number of images you anticipate capturing and the desired frequency of image uploads when selecting a plan.

Camera Activation⁚ Locate the camera’s serial number and activation code‚ typically found inside the battery compartment or on the camera’s packaging. Enter these details into your Moultrie Mobile account. The system will then associate your camera with your account.

Network Configuration⁚ Ensure your camera has adequate cellular service by checking signal strength in the camera’s intended location. Insert a compatible SD card and power on the camera. The camera will automatically attempt to connect to the Moultrie Mobile network.

Testing Connection⁚ After activation‚ perform a test image upload through the Moultrie Mobile platform to verify that the camera is successfully transmitting images. You’re now ready to receive images remotely!

Downloading and Viewing Images/Videos

After your Moultrie game camera has diligently captured images and videos‚ accessing and reviewing this data is essential. Depending on your camera model and setup‚ you have several options for retrieving your media.

Direct SD Card Access⁚ The most common method involves physically removing the SD card from the camera and inserting it into a computer or card reader. Once connected‚ the SD card will appear as a removable drive‚ allowing you to browse the folders and copy the desired images and videos to your computer.

USB Connection⁚ Some Moultrie camera models support direct USB connection to a computer. Connect the camera using a USB cable‚ and it should be recognized as a removable storage device‚ granting access to the SD card’s contents.

Moultrie Mobile App⁚ If you’re using a Moultrie Mobile camera‚ images and videos are automatically uploaded to your Moultrie Mobile account. You can then access and download these files through the Moultrie Mobile app on your smartphone or tablet.

Viewing and Managing Files⁚ Once downloaded‚ you can use standard image and video viewing software on your computer or mobile device to review your captured media. Organize your files into folders for easy access and consider using photo editing software for enhancements.

Maintenance and Care for Longevity

To ensure your Moultrie game camera continues to perform reliably and capture valuable data for years to come‚ regular maintenance and proper care are crucial. Protecting your investment involves several key practices that safeguard against environmental damage and internal wear.

Regular Cleaning⁚ Periodically clean the exterior of your camera with a soft‚ damp cloth to remove dirt‚ dust‚ and debris. Pay special attention to the lens cover‚ ensuring it is free from smudges and scratches that could affect image quality.

Battery Management⁚ Use high-quality batteries and replace them regularly‚ even if they still appear to have some charge. Leaking batteries can cause significant damage to the camera’s internal components. Remove batteries when storing the camera for extended periods.

SD Card Care⁚ Use a reliable SD card and format it regularly to maintain optimal performance. Avoid removing the SD card while the camera is powered on or actively recording‚ as this can corrupt the data.

Weather Protection⁚ While Moultrie cameras are designed to withstand outdoor conditions‚ consider using a protective housing or shield to further safeguard against rain‚ snow‚ and extreme temperatures. Inspect the camera’s seals and gaskets regularly to ensure they are intact and providing adequate protection.

rosario de los 7 dolores pdf

What is the Rosario de los 7 Dolores?

The Rosario de los 7 Dolores, or Rosary of the Seven Sorrows, is a devotion honoring the Virgin Mary’s suffering during Jesus’s passion and death. It’s a prayer for strength and repentance.

Origin and History of the Devotion

The devotion to the Seven Sorrows of Mary has roots tracing back to the 13th century. It gained prominence through revelations to Saint Bridget of Sweden, who was told of seven graces granted to those honoring Mary’s tears and sorrows. The rosary format, with specific meditations and prayers, developed over time. Some accounts link the rosary to a visionary, Marie Claire, to whom Our Lady gave the prayers and meditations. The devotion emphasizes meditating upon Mary’s profound suffering alongside Jesus, fostering compassion and a deeper understanding of Christ’s sacrifice. This ancient prayer is seeing a revival as requested by Our Lady of Kibeho.

Significance of the Seven Sorrows

The Seven Sorrows represent key moments of pain and grief experienced by Mary, offering a powerful lens through which to contemplate the depth of Christ’s sacrifice and Mary’s unwavering faith. Meditating on these sorrows allows believers to connect with Mary’s compassion and find solace in their own suffering. The devotion provides a pathway to repentance and conversion, as highlighted by Our Lady of Kibeho. By honoring Mary’s sorrows, individuals seek to gain strength, peace, and a deeper understanding of divine mysteries. The rosary serves as a reminder of love, sacrifice, and the promise of consolation in times of affliction.

How to Pray the Rosario de los 7 Dolores

Praying the Rosario involves meditating on each of Mary’s sorrows while reciting specific prayers. This practice offers solace, strength, and a deeper connection to Mary’s suffering and faith.

Structure and Prayers

The Rosario de los 7 Dolores follows a distinct structure. It begins with an Act of Contrition, expressing sorrow for sins and seeking God’s mercy. Then, for each of the seven sorrows, one Our Father (Padre Nuestro) is recited, followed by seven Hail Marys (Ave Marías). These prayers accompany meditation on the specific sorrow.

After each set of prayers, a Gloria is said. The Fatima prayer can also be included⁚ “Mother, let my heart accompany your sorrow in the death of Jesus”. The Hallow App provides guidance. This structured prayer, rooted in the 13th century, seeks strength for repentance.

Meditations on Each Sorrow

Praying the Rosario de los 7 Dolores involves meditating on each sorrow of Mary. These meditations are crucial for understanding the depth of Mary’s suffering and her profound love for Jesus. Each sorrow offers an opportunity to reflect on the pain and sacrifice endured by both Mary and Jesus during his Passion.

Marie Claire, a visionary, received meditations for each sorrow from the Mother of the Word. By contemplating these sorrows, devotees seek strength to repent and convert their hearts. Meditating allows one to connect with the sorrow and find solace in Mary’s example.

The Seven Sorrows of Mary

The Seven Sorrows of Mary are key moments of pain and grief she experienced alongside Jesus. These sorrows highlight her deep connection to His sacrifice and suffering.

1st Sorrow⁚ The Prophecy of Simeon

The first sorrow recalls when Mary and Joseph presented Jesus in the Temple. Simeon, a righteous man, recognized Jesus as the Messiah but prophesied to Mary that a sword of sorrow would pierce her heart.

This prophecy foreshadowed the immense suffering she would endure as she witnessed her Son’s Passion. It marked the beginning of her journey of sorrow, linking her intimately with Jesus’s redemptive mission. The pain foretold by Simeon highlights Mary’s unique role in salvation history and her unwavering faith in God’s plan, even amidst future suffering. This is a cause for reflection.

2nd Sorrow⁚ The Flight into Egypt

The second sorrow reflects on Mary and Joseph’s flight into Egypt with the infant Jesus to escape Herod’s decree to kill all male children. This involved immense hardship and uncertainty, as they became refugees in a foreign land.

This sorrow highlights the challenges and difficulties faced by the Holy Family, emphasizing their vulnerability and reliance on God’s providence. Leaving their home and community, they endured a long and perilous journey to protect Jesus. It reminds us of the sacrifices families make to protect their loved ones and the importance of compassion for those who are displaced and persecuted.

3rd Sorrow⁚ The Loss of Jesus in the Temple

The third sorrow meditates on Mary and Joseph’s distress when they lost young Jesus in Jerusalem and searched for Him for three days. Their anxiety and worry underscore the deep bond between parent and child and the pain of separation.

This sorrow highlights the mystery of Jesus’s divine nature and His growing awareness of His mission. When they found Him in the Temple, teaching the elders, He reminded them that He had to be in His Father’s house. It teaches us about obedience to God’s will, even when it is difficult to understand, and the importance of seeking Jesus in our lives.

4th Sorrow⁚ Mary Meets Jesus Carrying the Cross

The fourth sorrow recalls the agonizing encounter between Mary and Jesus as He carried His cross to Calvary. Imagine the immense pain Mary felt, witnessing her beloved Son, burdened, beaten, and humiliated. This sorrow highlights Mary’s unwavering love and compassion for Jesus.

She endures this painful moment, sharing in His suffering. This sorrow teaches us about empathy and the importance of standing by those who are suffering. It reminds us to offer support and comfort to those who carry their own crosses in life. Mary’s example encourages us to be present and compassionate in the face of others’ pain.

5th Sorrow⁚ The Crucifixion of Jesus

The fifth sorrow meditates on the crucifixion of Jesus. Picture Mary standing at the foot of the cross, witnessing her Son’s agonizing death. This is the peak of her suffering, the ultimate sacrifice for humanity’s redemption.

Mary’s unwavering faith and love remain steadfast even in this moment of profound sorrow. This sorrow reminds us of the immense love and sacrifice of Jesus for our salvation. It calls us to reflect on the depth of His suffering and to appreciate the gift of redemption He offers. We are reminded of Mary’s courage in the face of unbearable pain.

6th Sorrow⁚ Mary Receives the Body of Jesus

This sorrow contemplates the moment when Mary receives Jesus’s lifeless body after His crucifixion. Imagine the weight of His broken body in her arms, the unimaginable grief of a mother holding her dead son.

This sorrow highlights Mary’s profound love and compassion. She embraces her Son, offering a final act of maternal tenderness. This image evokes feelings of empathy and sorrow for Mary’s pain. It signifies her unwavering devotion and acceptance of God’s will, even in the face of immense loss. We reflect on the profound sacrifice made for humanity.

7th Sorrow⁚ The Burial of Jesus

The seventh sorrow focuses on the burial of Jesus. Consider the finality of placing His body in the tomb. This sorrow embodies the pain of separation and the apparent end of Jesus’s earthly life.

Reflect upon Mary’s grief as she witnesses her Son being laid to rest. Despite the immense sadness, there’s a glimmer of hope. This moment signifies not only loss but also anticipation of the Resurrection. Mary’s faith remains unwavering, trusting in God’s plan even amidst despair. The burial represents the ultimate sacrifice and the promise of eternal life.

Promises and Graces Associated with the Rosario

The Rosario de los 7 Dolores holds profound promises for those who devoutly pray it. Tradition states that those who honor Our Lady by meditating on her tears and sorrows will receive special graces. These include peace within families, illumination regarding divine mysteries, and consolation during times of sorrow. The Virgin Mary also promises to accompany devotees in their afflictions.

Moreover, this rosary is believed to grant strength for repentance and conversion. Praying with sincere meditation can lead to a deeper understanding of suffering and a closer relationship with Jesus and Mary. It fosters spiritual growth, offering solace and hope to those who seek it.

When to Pray the Rosario de los 7 Dolores

The Rosario de los 7 Dolores is particularly appropriate to pray during specific times of the year, especially when reflecting on the sorrows of Mary. The Feast of Our Lady of Sorrows, commemorated on September 15th, is a dedicated occasion to engage in this devotion, honoring Mary’s profound suffering and love during Jesus’s sacrifice.

Moreover, the Lenten season, with its focus on repentance and reflection on Christ’s Passion, offers a meaningful period for praying this rosary. Holy Week, leading up to Easter, provides an especially poignant time to meditate on the Seven Sorrows. However, the rosary can be prayed anytime, offering solace and strength throughout the year.

weaver instructional systems

Weaver Instructional Systems⁚ An Overview

Weaver Instructional Systems, established in 1979, provides computerized educational software. The company specializes in reading, language, study skills, and mathematics programs designed for students. Their systematic approach offers flexible, graduated curricula to enhance learning outcomes.

Weaver Instructional Systems has been a provider of educational software since 1979, focusing on systematically teaching essential skills. Their comprehensive approach caters to reading, language, study skills, and mathematics, serving students across various grade levels. The company’s foundational belief revolves around delivering flexible and graduated curricula, promoting effective learning. Weaver’s software solutions are designed to meet the diverse needs of learners, ensuring a personalized educational experience. The programs aim to improve comprehension, critical thinking, and problem-solving abilities. By integrating technology with proven teaching methodologies, Weaver Instructional Systems strives to empower students and educators alike, fostering academic success and lifelong learning. The materials can be accessed through the WS4000 workstation.

Core Curriculum and Programs

Weaver Instructional Systems offers self-paced software covering reading, language, math, and study skills. These programs cater to various grade levels, providing systematic instruction to enhance student learning and academic performance.

Reading and Language Skills Software

Weaver Instructional Systems provides comprehensive reading and language skills software designed to systematically improve students’ abilities. These programs cover essential areas such as vocabulary, reading comprehension, and writing proficiency. Worksheets, reading lessons, and writing exercises are integrated to reinforce learning and promote skill development. The software is structured to make learning accessible and applicable, though some users have expressed difficulties in applying learned concepts. The curriculum supports educators in delivering targeted instruction and monitoring student progress. It aims to build a strong foundation in literacy, enabling students to succeed academically and communicate effectively. Weaver’s approach focuses on gradual skill enhancement, ensuring that students grasp fundamental concepts before advancing to more complex material. This methodical design helps to create confident and competent readers and writers.

Mathematics and Study Skills Programs

Weaver Instructional Systems offers specialized mathematics and study skills programs designed to enhance academic performance. The mathematics software covers essential mathematical concepts through a self-paced, systematic approach. This method ensures students build a solid understanding of fundamental principles. The study skills programs focus on improving organizational techniques, time management, and effective learning strategies. These skills are crucial for academic success and overall personal development. Through interactive exercises and structured lessons, students learn how to approach complex problems, manage their workload efficiently, and retain information effectively. The curriculum is designed to be flexible and adaptable, catering to different learning styles and paces. Weaver aims to empower students with the tools they need to excel in their studies and beyond, fostering a lifelong love of learning and academic achievement.

Science Terminology Program

Weaver Instructional Systems offers a Science Terminology Program designed to help students master the language of science. This program provides a structured approach to learning and understanding scientific terms, which are essential for success in science-related subjects. The program features interactive lessons, quizzes, and activities that make learning engaging and effective. Students can build a strong foundation in scientific vocabulary, enabling them to comprehend complex concepts and improve their overall understanding of science. A 30-day trial is available, allowing users to experience the program’s benefits firsthand. The program aims to equip students with the necessary tools to excel in science, fostering confidence and a deeper appreciation for the scientific world. The Science Terminology Program is a valuable resource for students looking to enhance their scientific knowledge and academic performance through targeted vocabulary acquisition and retention strategies. Access sample lessons to explore the program’s content and teaching methods.

WS4000 Work Station

The Weaver Instructional Systems WS4000 Work Station offers a comprehensive learning environment. It provides interactive educational tools and resources, supporting students in reading, language, math, and study skills development.

Features and Functionality of WS4000

The WS4000 Work Station by Weaver Instructional Systems is designed to offer a comprehensive and interactive learning experience. It incorporates features that systematically teach reading, language, study skills, and mathematics. The workstation provides self-paced instruction, allowing students to progress at their own speed. It includes a range of programs to support various grade levels and learning needs. The system’s functionality extends to tracking student progress, generating reports, and offering personalized feedback. It also offers sample lessons. The workstation’s design promotes engagement and effective learning. The WS4000 aims to create an accessible and supportive educational environment.

Company Information

Weaver Instructional Systems, Inc. was established in 1979. They are located in Grand Rapids, MI. The company develops and provides self-paced educational software for reading, language, math, and study skills.

Weaver Instructional Systems⁚ Establishment and Location

Weaver Instructional Systems was officially established in 1979. The company has been a consistent provider of educational software since then. Their primary location is in Cascade, Michigan, specifically at 6161 28th St SE, 49546-6931. This location serves as the headquarters for their operations. Weaver Instructional Systems focuses on developing and distributing instructional materials. These materials cover essential academic areas such as reading, language arts, mathematics, and study skills. They provide these resources to students across various grade levels. This establishment in Michigan allows them to efficiently manage their production, distribution, and customer support activities, serving a broad educational market. The company’s presence in Grand Rapids also situates them within a region known for business and development.

Customer Feedback and Reviews

Analysis of user reviews indicates mixed reactions. Some find the system difficult to use, hindering learning. Others may appreciate its structured approach. Overall, experiences seem to vary greatly among users.

Analysis of User Reviews and Comments

Examining user reviews of Weaver Instructional Systems reveals a spectrum of opinions regarding its effectiveness and usability. Some users express frustration with the system’s design, claiming it impedes the learning process rather than facilitating it. These comments often highlight difficulties in navigating the software and applying learned concepts practically. Conversely, other users commend the systematic teaching methods employed by Weaver, appreciating the structured approach to reading, language, math, and study skills. Positive feedback often emphasizes the curriculum’s flexibility and graduated difficulty levels, which cater to diverse learning needs. However, it is crucial to acknowledge that user experiences vary significantly, reflecting individual learning preferences and technological proficiency. A comprehensive understanding of Weaver’s strengths and weaknesses necessitates considering both positive and negative feedback to provide a balanced perspective.

Weaver’s Approach to Instructional Design

Weaver Instructional Systems employs a systematic teaching method. This computerized approach delivers structured reading, language, study skills, and mathematics instruction. The flexible curriculum caters to diverse student needs.

Systematic Teaching Methods

Weaver Instructional Systems utilizes systematic teaching methods to deliver comprehensive reading, language, study skills, and mathematics instruction. Their approach is computerized, offering structured and flexible learning experiences designed to meet varied student needs. The curriculum is graduated, ensuring progressive skill development. The system emphasizes a step-by-step approach, making learning accessible and manageable for all students.

The core of Weaver’s methodology lies in its ability to break down complex subjects into smaller, digestible components. This modular design allows educators to tailor the learning path to individual student requirements. With customizable options, teachers can adjust the pace and focus based on student performance and identified areas for improvement, ensuring effective knowledge acquisition.

Contact and Support

To reach Weaver Instructional Systems, you can contact them at 6161 28th St SE, Cascade, Michigan, 49546-6931, or call (616) 942-2891. They offer support for their educational software.

Reaching Weaver Instructional Systems

For those seeking to connect with Weaver Instructional Systems, several avenues are available to facilitate communication and support. The primary physical address for Weaver Instructional Systems is located at 6161 28th St SE, Cascade, Michigan, 49546-6931. This location serves as the central hub for their operations and administrative functions.

Individuals wishing to speak directly with a representative from Weaver Instructional Systems can do so by calling their dedicated phone line at (616) 942-2891; The company’s website, although information is limited, may provide a contact form or email address for inquiries. For specific questions about their Reading, Language, Math, and Study Skills software, reaching out through these channels is recommended.

vegetable planting guide zone 7

Zone 7 offers a substantial growing season, allowing gardeners to cultivate a wide variety of vegetables.
Knowing the optimal planting times is crucial to prevent frost damage and ensure a bountiful harvest.
This guide provides a planting schedule tailored for Zone 7.

Understanding Zone 7 Climate

Zone 7 is a region defined by specific climate conditions ideal for vegetable gardening.
Characterized by a moderate growing season, it provides ample time for most vegetable varieties to mature before the first frost.
The average last frost date falls around April 15th, while the first frost typically arrives around November 15th, giving approximately seven months of gardening time;
However, these dates can vary by a week or two, emphasizing the importance of monitoring local weather forecasts.
This extended growing window allows for planting a diverse range of vegetables, including both warm-season and cool-season crops.
Understanding the nuances of Zone 7’s climate, including temperature fluctuations and average rainfall, is essential for planning a successful vegetable garden.
Factors such as microclimates within your specific location can also influence planting decisions.
Pairing general Zone 7 knowledge with local expertise and careful observation will contribute to a thriving garden.
It is important to note that climate change is a factor and the climate might be different in the future.
Climate change should be taken into consideration as much as possible.

Frost Dates in Zone 7

Determining the average first and last frost dates is essential for successful vegetable gardening in Zone 7.
These dates serve as crucial benchmarks for planning your planting schedule, ensuring that tender plants are not exposed to damaging frost.
In Zone 7, the average last frost date typically falls around April 15th, marking the beginning of the safe planting season for most vegetables.
However, it’s important to remember that this is just an average, and actual frost dates can vary from year to year.
Similarly, the average first frost date in Zone 7 occurs around November 15th, signaling the end of the main growing season.

Again, this date is an average and can fluctuate depending on the specific weather patterns of the year.
To obtain more accurate frost date predictions for your specific location within Zone 7, consult local weather forecasts, agricultural extension offices, or experienced gardeners in your area.
Keep in mind that microclimates within your garden, such as sheltered areas or raised beds, can also influence frost occurrence.
Monitoring weather conditions closely, especially during the spring and fall, is crucial for protecting your plants from unexpected frost.
Employing frost protection measures like row covers or cold frames can help extend the growing season and safeguard your crops.
Adapt your planting schedule based on the actual frost dates in your area.

Importance of Planting Schedule

Adhering to a well-structured planting schedule is paramount for maximizing vegetable garden productivity in Zone 7.
A planting schedule acts as a roadmap, guiding gardeners on when to sow seeds, transplant seedlings, and anticipate harvests.
By aligning planting activities with the optimal timing for each vegetable, gardeners can ensure vigorous growth, abundant yields, and minimize potential risks.
Planting too early can expose tender seedlings to damaging frosts, while planting too late may result in crops not reaching maturity before the first frost of fall;
A planting schedule takes into account factors such as frost dates, soil temperatures, and the specific needs of different vegetables.
It helps gardeners optimize their use of the growing season, ensuring that each crop has ample time to develop and produce.
Furthermore, a planting schedule allows for succession planting, where multiple crops of the same vegetable are planted at intervals to extend the harvest period.
This ensures a continuous supply of fresh produce throughout the growing season.
A well-planned schedule also facilitates crop rotation, a practice that involves alternating different vegetable families in the same garden beds to improve soil health and reduce pest and disease problems.
By following a planting schedule, gardeners can streamline their gardening activities, avoid costly mistakes, and enjoy a more rewarding and productive vegetable gardening experience.
It’s important to tailor your planting schedule to your specific microclimate.

Zone 7 Planting Calendar

A Zone 7 planting calendar serves as an indispensable tool for gardeners, providing a month-by-month guide to planting vegetables at the optimal times.
This calendar takes into account the specific climate conditions of Zone 7, including average frost dates and temperature ranges, to ensure that crops are planted when they have the best chance of success.
The calendar typically includes information on when to start seeds indoors, when to direct sow seeds outdoors, and when to transplant seedlings into the garden.
For example, cool-season crops like lettuce, spinach, and radishes can be planted in early spring, while warm-season crops like tomatoes, peppers, and cucumbers should be planted after the last frost.
The calendar also provides guidance on succession planting, allowing gardeners to stagger plantings of the same crop to extend the harvest season.
Additionally, the calendar may include information on specific varieties that are well-suited to Zone 7 conditions.
By following a Zone 7 planting calendar, gardeners can ensure that their vegetables are planted at the right time, maximizing their chances of a successful harvest.
Consulting a planting calendar tailored to Zone 7 is a proactive step towards a flourishing vegetable garden.
Remember to adjust the calendar based on microclimates.
It’s also helpful to keep records of past planting dates and harvest times to refine your calendar over time.

Spring Planting Guide for Zone 7

Spring in Zone 7 is a vibrant time for vegetable gardening, offering a window of opportunity to plant a variety of crops.
A spring planting guide for Zone 7 outlines the best vegetables to plant during this season and provides a timeline for planting based on average frost dates.
Cool-season crops thrive in the cooler temperatures of early spring, including leafy greens like lettuce, spinach, and kale, as well as root vegetables like carrots, radishes, and beets.
These crops can be planted as soon as the ground can be worked, typically a few weeks before the last expected frost.
As the weather warms up, gardeners can begin planting warm-season crops like tomatoes, peppers, and eggplants, but only after the danger of frost has passed.
It’s essential to monitor the weather forecast and protect tender seedlings from unexpected late frosts.
Starting seeds indoors is a great way to get a head start on the growing season, especially for crops that require a longer growing period.
A spring planting guide also provides tips on soil preparation, watering, and fertilizing to ensure that plants get off to a strong start.
By following a spring planting guide for Zone 7, gardeners can maximize their yields and enjoy a bountiful harvest throughout the season.
Remember to consider microclimates in your garden.
Always harden off seedlings before transplanting;

Summer Planting Guide for Zone 7

Summer in Zone 7 presents a second opportunity for vegetable gardeners to extend their growing season.
The summer planting guide for Zone 7 focuses on planting crops that thrive in warm weather and mature quickly before the arrival of cooler temperatures in the fall.
This period is ideal for succession planting of vegetables like beans, cucumbers, and summer squash, ensuring a continuous harvest throughout the summer and into the early fall.
Heat-tolerant varieties of leafy greens such as spinach and lettuce can also be planted, but they require careful monitoring for adequate watering and shade during the hottest part of the day.
Consider planting heat-loving herbs like basil, oregano, and thyme, which flourish in the summer sun.
Summer is also an excellent time to plant fast-maturing vegetables like radishes and carrots for a quick crop.
When planting in the summer, it’s crucial to provide adequate water to plants, especially during periods of drought.
Mulching can help retain moisture in the soil and prevent weeds from taking over.
Protecting plants from pests and diseases is also essential in the summer, as these can quickly spread in warm, humid conditions.
By following a summer planting guide for Zone 7, gardeners can maximize their yields and enjoy a continuous supply of fresh vegetables throughout the season.
Monitor plants regularly for signs of stress or disease.
Harvest vegetables promptly to encourage further production.

Fall Planting Guide for Zone 7

As summer transitions into fall, Zone 7 gardeners have a final opportunity to plant vegetables for a late-season harvest.
The fall planting guide for Zone 7 focuses on cool-season crops that thrive in the cooler temperatures and shorter days of autumn.
This is an ideal time to plant leafy greens like lettuce, spinach, kale, and arugula, which prefer cooler conditions and can tolerate light frosts.
Root vegetables such as carrots, radishes, and turnips can also be planted in the fall for a late harvest.
Broccoli, cabbage, and cauliflower are other excellent choices for fall planting in Zone 7, as they benefit from the cooler temperatures and can mature before the first hard frost.
Garlic and shallots can be planted in the fall to overwinter and produce a crop the following summer.
When planting in the fall, it’s important to choose varieties that have a shorter maturity time to ensure they have enough time to grow before winter sets in.
Protecting plants from frost is crucial in the fall, so consider using row covers or cold frames to extend the growing season.
Mulching can also help protect plants from cold temperatures and conserve moisture in the soil.
By following a fall planting guide for Zone 7, gardeners can enjoy a late-season harvest of fresh, delicious vegetables even as temperatures drop.
Continue to water plants as needed.
Watch out for pests that may become more active in the cooler weather.

Starting Seeds Indoors in Zone 7

Starting seeds indoors in Zone 7 is a great way to get a head start on the growing season, especially for plants that require a long growing period.
Starting seeds indoors allows gardeners to control the growing environment and protect seedlings from harsh weather conditions.
The ideal time to start seeds indoors in Zone 7 depends on the specific vegetable and its days to maturity.
Generally, vegetables like tomatoes, peppers, and eggplants should be started indoors 6-8 weeks before the last expected frost date.
Broccoli, cabbage, and cauliflower can be started indoors 4-6 weeks before the last frost.

When starting seeds indoors, use a high-quality seed-starting mix and provide adequate light, either through grow lights or a sunny window.
Keep the soil consistently moist but not waterlogged, and maintain a temperature of 70-75°F for optimal germination.
Once the seedlings emerge, thin them to one plant per cell or pot and provide regular fertilization with a balanced liquid fertilizer.
Before transplanting seedlings outdoors, gradually acclimate them to outdoor conditions through a process called hardening off.
This involves gradually exposing the seedlings to increasing amounts of sunlight and outdoor temperatures over a period of 1-2 weeks;
By starting seeds indoors, Zone 7 gardeners can ensure a strong and healthy start for their vegetable plants and enjoy an earlier harvest.
Make sure you follow all of these steps to ensure a good start to your planting this year.

Direct Sowing in Zone 7

Direct sowing, or planting seeds directly into the garden soil, is a simple and effective method for many vegetables in Zone 7.
This method eliminates the need for transplanting, reducing the risk of transplant shock and saving time.
The best time to direct sow seeds in Zone 7 depends on the specific vegetable and its cold hardiness.
Cool-season crops like lettuce, spinach, radishes, and carrots can be direct sown in early spring, as soon as the soil can be worked.
Warm-season crops like beans, corn, squash, and cucumbers should be direct sown after the last expected frost date when the soil has warmed up.
Before direct sowing, prepare the soil by removing weeds, amending with compost, and leveling the surface.
Sow seeds at the recommended depth and spacing, and water gently to avoid washing them away.
Keep the soil consistently moist until the seeds germinate and the seedlings emerge.
Thin the seedlings as needed to provide adequate spacing for growth.
Direct sowing is a great option for vegetables that don’t transplant well or that grow quickly.
It also allows for succession planting, where you sow seeds every few weeks to extend the harvest season.
Consider the specific needs of each vegetable when deciding whether to direct sow or start seeds indoors.
By understanding the optimal timing and techniques for direct sowing, Zone 7 gardeners can maximize their vegetable yields.
Make sure that you read the seed packets to understand the needs of each plant.

Cold-Hardy Vegetables for Zone 7

Zone 7‘s climate, with its moderate winters, allows for the successful cultivation of a variety of cold-hardy vegetables.
These vegetables can withstand frost and even light freezes, making them ideal for extending the growing season into the cooler months.
Choosing the right cold-hardy vegetables can provide a continuous harvest throughout the fall, winter, and early spring.
Some of the most popular cold-hardy vegetables for Zone 7 include leafy greens like spinach, kale, lettuce, and arugula.
Root vegetables such as carrots, beets, turnips, and parsnips also thrive in cooler temperatures.
Cruciferous vegetables like broccoli, cauliflower, cabbage, and Brussels sprouts are well-suited for Zone 7‘s climate.
Other cold-hardy options include onions, garlic, leeks, and peas.
When planting cold-hardy vegetables, it’s important to choose varieties that are specifically bred for cold tolerance.
Planting these vegetables in the fall allows them to establish strong root systems before the onset of winter.
Protecting cold-hardy vegetables with row covers or cold frames can further extend their growing season.
Harvesting cold-hardy vegetables regularly encourages continued production.
Some cold-hardy vegetables, like kale and collards, even taste better after a frost.
By selecting and planting the right cold-hardy vegetables, Zone 7 gardeners can enjoy fresh, homegrown produce year-round.
These vegetables are a great way to add variety and nutrition to your diet during the colder months.
Be aware that these plants can also be planted earlier than most.

Extending the Growing Season in Zone 7

Zone 7 gardeners can significantly extend their growing season by employing various techniques and strategies.
While Zone 7 boasts a relatively long growing season, maximizing yields and enjoying fresh produce for more months is always desirable.
One effective method is starting seeds indoors several weeks before the last expected frost.
This gives plants a head start and allows for earlier transplanting into the garden.
Another popular technique is using season extension structures like cold frames, hoop houses, and row covers.
These structures provide protection from frost, wind, and other harsh weather conditions, allowing plants to thrive even in cooler temperatures.
Cold frames are simple, enclosed structures that can be used to harden off seedlings or protect cold-hardy crops.
Hoop houses are larger, semi-permanent structures that provide more space and better insulation.
Row covers are lightweight fabrics that can be draped directly over plants to protect them from frost and pests.
Choosing the right plant varieties is also crucial for extending the growing season.
Select cold-hardy varieties that can tolerate frost and continue to produce even in cooler temperatures.
Succession planting, or planting crops at regular intervals, is another effective way to extend the harvest season.

By planting new crops every few weeks, gardeners can ensure a continuous supply of fresh produce.
Mulching helps to retain soil moisture and regulate soil temperature, which can also extend the growing season.
Consider using thermal mass such as water jugs to passively heat your greenhouse.
With these techniques, Zone 7 gardeners can enjoy a longer and more productive growing season.

wonders grammar grade 5 answer key pdf

Overview of Wonders Grammar Grade 5 Answer Key PDF

The Wonders Grammar Grade 5 Answer Key PDF is a digital resource designed to accompany the Wonders Grade 5 grammar curriculum. It provides solutions to exercises‚ aiding comprehension and skill reinforcement for students and teachers alike.

What is Wonders Grammar Grade 5?

Wonders Grammar Grade 5 refers to a specific component of the Wonders reading program tailored for fifth-grade students. It focuses on developing and reinforcing essential grammar skills appropriate for this grade level. The curriculum covers a range of grammatical concepts‚ including parts of speech‚ sentence structure‚ verb tenses‚ and punctuation. Through various exercises and activities‚ students learn to apply these concepts effectively in their writing and communication. The program aims to build a strong foundation in grammar‚ enabling students to become proficient and confident writers and communicators as they progress through their education. Wonders Grammar Grade 5 provides structured lessons and practice opportunities to support student learning.

Importance of Answer Keys

Answer keys play a crucial role in the learning process‚ particularly for subjects like grammar. They provide immediate feedback‚ enabling students to check their work and identify areas where they may need additional support. For teachers‚ answer keys offer a valuable tool for assessing student understanding and tracking progress. They streamline the grading process‚ allowing educators to focus on providing targeted instruction. Moreover‚ answer keys promote self-assessment and independent learning‚ empowering students to take ownership of their education. They also ensure consistency and accuracy in evaluating student performance‚ fostering a fair and equitable learning environment. Ultimately‚ answer keys enhance the effectiveness of grammar instruction and facilitate student success.

Accessing Wonders Grammar Grade 5 Answer Key PDFs

Finding Wonders Grammar Grade 5 Answer Key PDFs involves checking official McGraw-Hill websites or educational platforms. Third-party resources or teacher networks might also offer access to these valuable learning aids.

Availability on Official Websites

Official McGraw-Hill Education websites are primary sources for accessing the Wonders Grammar Grade 5 Answer Key PDFs. These websites often host resources directly related to the Wonders curriculum. Educators and students can typically find answer keys within the resource sections of the Wonders Grade 5 program. Access might require registration or a valid school district login. Check for dedicated teacher resources or student support pages. Some websites may offer downloadable PDFs‚ while others might provide online access. Always prioritize official sources to ensure accuracy and alignment with the curriculum. Navigating the McGraw-Hill website is key.

Third-Party Resources

Beyond official websites‚ Wonders Grammar Grade 5 Answer Key PDFs can sometimes be found on third-party educational platforms. These resources might include websites offering study guides‚ tutoring services‚ or online learning materials. Exercise caution when using these sites‚ as the accuracy and reliability of the answer keys can vary. Cross-reference information with official sources whenever possible. Teacher forums and educational resource sharing sites can also be potential sources. Always be mindful of copyright restrictions and ensure that materials are used ethically and legally. Verify the content’s alignment with the specific edition of the Wonders curriculum to avoid confusion.

Content of Wonders Grammar Grade 5 Answer Keys

Wonders Grammar Grade 5 Answer Keys comprehensively cover all grammar topics included in the curriculum. They provide answers to exercises and assessments‚ facilitating effective learning and assessment for both students and educators alike.

Coverage of Grammar Topics

The Wonders Grammar Grade 5 program encompasses a wide array of essential grammar concepts‚ meticulously designed to build a strong foundation in language arts. The answer keys directly reflect this comprehensive scope‚ providing solutions for exercises covering parts of speech‚ sentence structure‚ verb tenses‚ and punctuation. Specifically‚ expect to find answers related to nouns‚ pronouns‚ verbs‚ adjectives‚ adverbs‚ prepositions‚ conjunctions‚ and interjections. Furthermore‚ the keys address subject-verb agreement‚ correct tense usage‚ and proper punctuation‚ ensuring students master all fundamental grammar skills necessary for effective communication and writing proficiency in fifth grade.

Structure and Format of the Answer Key

The Wonders Grammar Grade 5 Answer Key PDFs are typically structured to mirror the organization of the student workbook or textbook. Each section or chapter corresponds directly to its counterpart in the curriculum. Answers are usually presented in a clear and concise manner‚ often directly following the question or exercise. The format may include simple lists of correct answers‚ fill-in-the-blank solutions‚ or even short explanations where necessary. Furthermore‚ some answer keys might provide page numbers or references to the corresponding lesson in the textbook‚ facilitating easy navigation and cross-referencing for both students and educators using the material.

Benefits of Using Wonders Grammar Grade 5 Answer Key

The Wonders Grammar Grade 5 Answer Key offers significant benefits. It allows quick verification of answers‚ provides immediate feedback‚ aids self-assessment‚ and supports efficient teaching by saving time on manual answer checking.

For Students

For students‚ the Wonders Grammar Grade 5 Answer Key PDF provides a valuable self-assessment tool‚ enabling them to check their work and identify areas needing improvement. By comparing their answers with the key‚ students gain immediate feedback‚ fostering independent learning and reinforcing grammar concepts.

This resource helps students understand correct usage and identify mistakes‚ encouraging them to correct errors and deepen their understanding. Access to the answer key promotes confidence and reduces anxiety‚ leading to more effective and enjoyable grammar practice sessions and improved academic performance overall.

For Teachers

For teachers‚ the Wonders Grammar Grade 5 Answer Key PDF serves as an efficient tool for assessing student progress and identifying areas where additional instruction is needed. It allows for quick and accurate grading of assignments‚ freeing up valuable time for lesson planning and individualized student support.

The answer key ensures consistency in evaluating student work‚ providing a standardized measure of understanding. It also helps teachers pinpoint common errors and misconceptions among students‚ enabling them to tailor their teaching strategies to address specific needs and improve overall grammar proficiency in the classroom.

Common Issues and Solutions

Users may face challenges like locating the correct answer key or understanding the provided answers; Solutions involve verifying ISBNs‚ cross-referencing content‚ and seeking clarification through educational forums or teacher assistance.

Finding the Correct Answer Key

Locating the right Wonders Grammar Grade 5 Answer Key PDF can be tricky‚ as different editions and versions exist. Start by verifying the publication year and ISBN of your textbook. Match these details precisely with the answer key’s information. Check the publisher’s official website first‚ as they often provide supplemental resources. If unavailable there‚ explore reputable educational websites‚ ensuring the source is credible. Be wary of unofficial sites‚ as they may offer inaccurate or outdated answer keys. Always cross-reference a few answers to confirm the key’s reliability before extensive use. Misaligned keys can hinder learning.

Understanding the Answers

Merely possessing the Wonders Grammar Grade 5 Answer Key PDF is insufficient; comprehension of the answers is crucial. If a solution is unclear‚ revisit the relevant grammar rules and examples in the textbook. Break down the sentence structure and identify the grammatical elements in question. Consult online grammar resources or seek assistance from a teacher or tutor for clarification. Don’t passively accept the answers; actively analyze why each solution is correct‚ focusing on the underlying principles. Understanding the reasoning behind the answers fosters genuine learning and prevents rote memorization. Prioritize grasping concepts over simply knowing the answers.

Additional Resources for Grammar Practice

Beyond the Wonders curriculum‚ numerous resources can bolster grammar skills. These include online grammar tools‚ printable worksheets‚ interactive exercises‚ and grammar-focused websites. Utilizing diverse resources enhances learning and caters to different learning styles for effective grammar practice.

Online Grammar Tools

Several online platforms offer interactive grammar exercises and tools suitable for Grade 5 students. Websites like Grammaropolis and Education.com provide engaging activities that cover various grammar concepts‚ including parts of speech‚ sentence structure‚ and punctuation. These tools often feature quizzes‚ games‚ and interactive lessons to make learning fun and effective. Many platforms also provide immediate feedback‚ allowing students to identify and correct their mistakes. Furthermore‚ some tools offer personalized learning paths‚ adapting to the student’s skill level and learning pace. These online resources supplement the Wonders curriculum and provide additional opportunities for grammar practice.

Printable Worksheets

Printable grammar worksheets serve as a valuable resource for reinforcing concepts taught in the Wonders Grade 5 curriculum. Websites such as K12Reader and Super Teacher Worksheets offer a wide array of free‚ downloadable worksheets focusing on specific grammar skills. These worksheets often include exercises on identifying parts of speech‚ correcting sentence fragments‚ and applying proper punctuation. They provide a structured approach to practice‚ enabling students to solidify their understanding of grammar rules. Teachers can also create custom worksheets to target specific areas of need. Printable worksheets offer flexibility and can be used both in the classroom and at home.

Tips for Effective Grammar Learning

Effective grammar learning involves consistent practice and a solid grasp of fundamental rules. Utilizing resources like answer keys alongside regular exercises can significantly improve comprehension and retention. Reviewing mistakes and seeking clarification are also crucial.

Regular Practice

Consistent‚ regular practice is paramount for mastering grammar concepts in Wonders Grammar Grade 5. Daily or frequent engagement with exercises helps solidify understanding and reinforces learned rules. Utilize the Wonders Grammar Grade 5 Answer Key PDF to check your work and identify areas needing further attention. Short‚ focused sessions are often more effective than infrequent‚ lengthy study periods. Incorporate grammar practice into daily writing and speaking habits. The more you use grammar actively‚ the better you will become at it. Make grammar a habit‚ not a chore‚ for long-term success.

Understanding Grammar Rules

Effective grammar learning involves more than just memorizing rules; it requires a deep understanding of how these rules function within the English language. The Wonders Grammar Grade 5 Answer Key PDF can be a valuable tool for clarifying concepts‚ but it should complement‚ not replace‚ a solid grasp of grammar principles. Focus on understanding the “why” behind each rule‚ not just the “what.” Explore examples beyond the textbook to see rules in action. Break down complex rules into simpler components for easier comprehension. Seek clarification from teachers or resources when encountering difficulties. A strong foundation in grammar rules promotes confident and accurate communication.

youth football drills pdf

Youth Football Drills PDF⁚ A Comprehensive Guide

This comprehensive guide delves into the world of youth football drills‚ offering coaches and players a valuable resource to enhance skills and understanding. Explore various training methods‚ practice plans‚ and safety considerations for a successful season.

Youth football drills are fundamental to developing young athletes into skilled and confident players. These drills provide a structured approach to learning the basics of the game‚ fostering teamwork‚ and instilling a love for football. Focusing on age-appropriate exercises ensures that young players can safely and effectively develop their abilities.

Effective youth football drills encompass a range of skills‚ from basic stances and movements to more advanced techniques like passing‚ receiving‚ tackling‚ and blocking. A well-rounded training regimen incorporates offensive and defensive drills‚ preparing players for all aspects of the game. Remember to prioritize safety by implementing proper coaching techniques.

Practice planning and safety are paramount in youth football. A sample practice plan can help coaches organize training sessions effectively. By using structured approaches‚ you can enhance player skills while minimizing the risk of injuries. With the right drills and a focus on safety‚ youth football can be a rewarding and enriching experience for all involved.

Fundamentals and Skill Development

Mastering the fundamentals is crucial for young football players. Skill development drills enhance basic techniques‚ ensuring a solid foundation for future success on the field.

Basic Stance and Movement Drills

Developing a proper stance and efficient movement is paramount in youth football. These drills focus on building a strong foundation for all positions. The “Sumo Drill‚” a favorite for instilling aggression‚ enhances blocking techniques. Angle tackle drills combine tackling skills with agility‚ while cross drills improve receiver focus under pressure. These exercises ensure players maintain balance‚ coordination‚ and quickness.

Proper stance drills emphasize correct foot placement‚ knee bend‚ and back posture‚ vital for power and agility. Movement drills include shuffling‚ backpedaling‚ and sprinting‚ enhancing players’ ability to react and move efficiently on the field. Incorporating these drills early establishes good habits. This promotes better performance and reduces the risk of injuries.

Passing and Receiving Drills

Passing and receiving are crucial skills that require dedicated practice; These drills focus on developing accuracy‚ timing‚ and sure hands. “Drop Back Passing Lines” and “Sprint Out Passing Lines” improve quarterback footwork and release. Cross drills teach receivers to concentrate on the ball despite distractions‚ enhancing their catching abilities. These drills ensure quarterbacks make accurate throws.

Effective receiving drills emphasize proper hand placement‚ route running‚ and catching in traffic. Players learn to secure the ball quickly and transition into a running position. Drills incorporate various pass types‚ including short‚ medium‚ and long throws. Repetition and attention to detail are essential. These are essential for mastering these skills. Consistently practicing these drills refines timing and builds confidence.

Tackling and Blocking Drills

Mastering tackling and blocking is vital for both offensive and defensive success. Tackling drills emphasize proper technique‚ including approach angle‚ hitting zone‚ and wrapping up securely. Angle Tackle Drills improve a player’s ability to effectively take down an opponent. The Chute Drill is used to practice proper tackling form.

Blocking drills teach players how to effectively engage and control opponents. The goal is to create running lanes and protect the quarterback. The Sumo Drill works on aggression. Drills incorporate footwork‚ hand placement‚ and maintaining a strong base. The 3-on-2 drill teaches defensive linemen to react to blocking schemes. Repetition and focused instruction are essential. These drills are critical for a well-rounded football player.

Offensive Drills

Offensive drills are crucial for developing a potent attack. These drills focus on refining skills for running backs‚ quarterbacks‚ and offensive linemen‚ ensuring seamless execution and maximizing scoring opportunities on the field.

Running Back Drills

Running back drills are essential for developing agility‚ speed‚ and ball-handling skills in youth football players. These drills focus on improving a player’s ability to effectively carry the ball‚ make quick cuts‚ and evade defenders.

One key drill is the “Cone Weave‚” which enhances agility and footwork as players navigate through a series of cones. Another important drill is the “Tackling Chute” drill‚ designed to improve a running back’s ability to run through contact and maintain balance. “Angle Tackle Drill” will improve tackling skills.

Additionally‚ drills that focus on catching passes out of the backfield are crucial for developing a well-rounded running back. These exercises improve hand-eye coordination and the ability to secure the ball in various situations. By consistently practicing these drills‚ young running backs can develop the skills necessary to excel on the field and contribute to their team’s success. Remember that good technique is also important!

Quarterback Drills

Quarterback drills are crucial for developing accuracy‚ arm strength‚ and decision-making abilities in young football players. Effective drills focus on honing throwing mechanics‚ improving footwork‚ and enhancing the ability to read defenses.

One essential drill is the “Drop Back Passing Lines‚” which helps quarterbacks perfect their drop-back technique and throwing motion. Another important drill is the “Sprint Out Passing Lines‚” designed to improve accuracy when throwing on the run. The player must concentrate on the football.
Furthermore‚ drills that simulate game situations‚ such as reading coverage and making quick decisions under pressure‚ are invaluable. These exercises build confidence and enhance the quarterback’s ability to lead the offense effectively. The quarterback must have a good technique. By consistently practicing these drills‚ young quarterbacks can develop the skills necessary to excel on the field and become effective leaders. Remember that constant practice is also a key ingredient!

Offensive Line Drills

Offensive line drills are essential for developing the strength‚ technique‚ and coordination required to protect the quarterback and create running lanes. These drills focus on improving stance‚ footwork‚ and blocking skills‚ ensuring the line functions as a cohesive unit.

One fundamental drill is the “Angle Blocks” drill‚ which emphasizes proper footwork and pad level when executing angle blocks. Another crucial drill focuses on maintaining a strong base and low pad level‚ allowing linemen to control their opponents effectively. The sumo drill can be used for aggression.

Furthermore‚ drills that simulate various blocking schemes‚ such as double teams and combo blocks‚ are vital for developing teamwork and communication. By consistently practicing these drills‚ young offensive linemen can develop the skills necessary to dominate the line of scrimmage and pave the way for offensive success. Remember that teamwork is key! The Gap Attacker is another great drill.

Defensive Drills

Defensive drills are crucial for developing tackling skills‚ pass rushing techniques‚ and overall defensive strategies. These drills help players react quickly and effectively‚ disrupting the opponent’s offense and securing possession.

Defensive Line Drills

Defensive line drills are essential for developing the skills and techniques required to disrupt the offensive line and pressure the quarterback. These drills focus on improving explosiveness‚ agility‚ and hand placement‚ which are all critical for success on the defensive line. One example includes the Sumo Drill‚ which enhances aggression and strength‚ while the Gap Attacker drill teaches quick reactions and penetration.

The 3-on-2 drill can be used to teach reacting to blocking schemes‚ and the hustle drill helps with pass rushing and pursuit. Furthermore‚ drills often involve the take-off of defensive linemen. Proper instruction and repetition are key to mastering these techniques. These drills will ultimately help players develop into great all around football players.

Linebacker Drills

Linebacker drills are crucial for developing the agility‚ tackling proficiency‚ and coverage skills necessary for success at the linebacker position. These drills are designed to enhance a linebacker’s ability to read plays‚ react quickly‚ and make impactful tackles. Focus is placed on improving footwork‚ lateral movement‚ and the ability to shed blockers.

Examples include agility ladder drills‚ cone drills for improving change of direction‚ and tackling drills that emphasize proper technique and angles. Linebackers must also develop strong pass coverage skills‚ which are honed through drills that focus on dropping into coverage‚ reading the quarterback’s eyes‚ and intercepting passes; Proper execution and repetition are key components of these drills.

Practice Planning and Safety

Effective practice planning and a strong emphasis on safety are paramount in youth football. This section will provide guidance on creating structured practice plans and prioritizing player well-being during all drills.

Sample Youth Football Practice Plan PDF

This section provides a sample youth football practice plan in PDF format‚ designed to help coaches structure their training sessions effectively. The plan incorporates various drills focused on skill development‚ including warm-up exercises‚ fundamental drills for stance and movement‚ passing and receiving practice‚ and tackling and blocking techniques. It also includes offensive and defensive drills tailored to different positions‚ such as running backs‚ quarterbacks‚ offensive linemen‚ defensive linemen‚ and linebackers.

The practice plan emphasizes the importance of demonstrating skills‚ explaining drills clearly‚ and conducting walk-throughs before full execution. Furthermore‚ it integrates game-like scenarios to enhance players’ understanding and application of the skills learned. Safety considerations are also woven into the plan to minimize the risk of injuries during practice. This comprehensive resource aims to assist coaches in creating engaging and productive training sessions for their youth football teams.

Importance of Safety in Youth Football Drills

Ensuring the safety of young athletes during football drills is paramount. Proper coaching techniques‚ equipment fitting‚ and adherence to safety guidelines are crucial. Implementing a levels of contact system can help players gradually develop their contact skills while minimizing the risk of injury. Coaches should prioritize teaching proper tackling and blocking techniques to prevent head and neck injuries.

Adequate hydration and rest are also essential for player safety. Practice plans should incorporate regular breaks to prevent fatigue‚ which can increase the likelihood of injuries. Furthermore‚ coaches should be vigilant in monitoring players for signs of injury or discomfort and should have a clear protocol for addressing medical concerns. By prioritizing safety in youth football drills‚ coaches can create a positive and secure environment for young athletes to learn and develop their skills.

wright brothers drill test pdf

Wright Brothers Wind Tunnel Tests⁚ An Overview

The Wright brothers‚ frustrated with existing aerodynamic data‚ embarked on a groundbreaking series of wind tunnel tests. These tests aimed to accurately measure lift and drag‚ improving upon available but unreliable information and refining aircraft designs.

The Wright Brothers’ Frustration with Existing Aerodynamic Data

By the end of 1901‚ Wilbur and Orville Wright were deeply dissatisfied with the performance of their 1900 and 1901 gliders. These aircraft‚ although flown extensively‚ failed to meet the expectations set by the prevailing aerodynamic data of the time‚ particularly those derived from figures like Lilienthal. The brothers questioned the accuracy and applicability of this existing data‚ which they had initially used as the foundation for their glider designs. Recognizing the discrepancy between theory and reality‚ they resolved to independently measure lift and drag to refine their understanding of aerodynamics and improve their aircraft’s flight characteristics‚ leading them to construct their own wind tunnel.

The Decision to Conduct Wind Tunnel Tests

Driven by the inadequacy of existing aerodynamic data‚ the Wright brothers decided to conduct their own wind tunnel tests. This pivotal decision marked a turning point in their pursuit of flight.

Building Their Own Wind Tunnel

Facing unreliable aerodynamic data‚ the Wright brothers decided to construct their own wind tunnel. This innovative step allowed them to gather precise measurements of lift and drag. They designed and built the wind tunnel in their Dayton‚ Ohio‚ shop during the fall of 1901. The wind tunnel was constructed to test their model wings. The tunnel featured a fan powered by a gas engine‚ generating wind speeds between 25 to 35 mph. This allowed for controlled experiments‚ vital for improving their glider designs and ultimately achieving powered flight.

The Design of the Wright Brothers’ Wind Tunnel

The Wright brothers’ wind tunnel was a small‚ but effective device. It featured a fan to generate airflow through a test section where wing models could be mounted and studied‚ leading to innovative designs.

State-of-the-Art for Its Time

For its time‚ the Wright brothers’ wind tunnel represented a significant advancement. It allowed for controlled experiments to measure lift and drag on different wing shapes. The design incorporated a fan powered by a belt-drive system‚ generating a consistent airflow. This facilitated a systematic analysis of aerodynamic properties‚ far exceeding the capabilities of previous methods. The innovative setup enabled the Wrights to collect crucial data‚ contributing to their success in achieving powered flight‚ despite the limitations of the era’s technology. Their wind tunnel design proved instrumental‚ pushing the boundaries of aerodynamic understanding at the time.

The Wind Tunnel Testing Process

The Wright brothers meticulously tested various wing designs within their wind tunnel. They measured the aerodynamic forces‚ enabling them to refine their understanding of lift and drag characteristics for each design.

Measuring Lift and Drag

To measure lift and drag‚ the Wright brothers built small balances that were integral to their wind tunnel setup. These balances allowed them to quantify the forces acting on the airfoil models placed inside the tunnel. By carefully observing and recording these measurements‚ they could determine the aerodynamic performance of each wing design. This process involved systematically testing different wing shapes and angles of attack‚ providing crucial data. The brothers’ innovative use of balances allowed them to gather precise information that would later revolutionize aviation design. Their dedication ensured accurate data collection for analysis.

Data Recording and Analysis

The Wright brothers meticulously recorded their wind tunnel data‚ utilizing wallpaper scraps and notebooks. This detailed analysis led to the world’s best collection of aerodynamic data‚ essential for their designs.

Using Wallpaper and Notebooks

The Wright brothers demonstrated remarkable ingenuity in their data recording methods. Lacking sophisticated equipment‚ they ingeniously repurposed readily available materials. They used the backs of wallpaper scraps to note down initial measurements during wind tunnel tests. These were then supplemented by detailed entries in their notebooks. Page after page filled with precious information‚ carefully documenting lift and drag coefficients for various wing shapes. This meticulous approach‚ using simple tools‚ ensured that they captured a wealth of aerodynamic knowledge. It ultimately formed the bedrock for their pioneering achievements in flight and changed the world.

The Significance of the Wind Tunnel Tests

The Wright brothers’ wind tunnel tests were pivotal. They enabled the creation of the world’s best collection of aerodynamic data. This was crucial for designing successful aircraft.

Creating the World’s Best Collection of Aerodynamic Data

Through meticulous wind tunnel experiments‚ the Wright brothers amassed an unparalleled collection of aerodynamic data. Their frustration with existing‚ unreliable data fueled the creation of their own data sets. The brothers carefully recorded measurements‚ utilizing wallpaper scraps and filling notebooks with vital information. This dedication allowed them to build a comprehensive understanding of lift and drag. In just a few months‚ the Wrights had surpassed the existing knowledge base‚ becoming the leading experts in aerodynamics. This superior data was instrumental in their subsequent aircraft designs and successes‚ paving the way for controlled‚ sustained flight.

Impact on Glider Design

The Wright brothers utilized data from their wind tunnel tests to refine glider designs. These modifications‚ based on empirical evidence‚ directly improved glider performance and controllability‚ paving the way for powered flight.

Modifying Designs Based on Wind Tunnel Results

The Wright brothers meticulously analyzed the data gathered from their wind tunnel experiments and used it to directly inform design changes to their gliders. They adjusted wing camber and aspect ratio based on the lift and drag measurements obtained. These modifications were crucial to improving aerodynamic efficiency and control. By iteratively testing and refining their designs‚ the Wrights moved beyond guesswork and relied on empirical data. This allowed them to optimize their gliders for stable and controlled flight‚ correcting issues identified during earlier flight tests and ultimately leading to their success.

Replicating the Wright Brothers’ Wind Tunnel Tests

Interactive wind tunnel simulations offer a way to replicate the Wright brothers’ experiments. These simulations allow users to explore the effects of different airfoil designs‚ mirroring the Wrights’ approach.

Interactive Wind Tunnel Simulations

Modern technology enables interactive simulations of the Wright brothers’ wind tunnel. These simulations allow users to test virtual airfoil models‚ altering their shapes and angles of attack. Users can observe changes in lift and drag forces in real-time‚ just as the Wrights did. Such simulations offer an invaluable educational tool‚ revealing aerodynamic principles and the impact of design choices. They enable students and enthusiasts alike to appreciate the ingenuity of the Wright brothers’ approach to solving the challenges of flight‚ providing a hands-on understanding of aerodynamics‚ and allowing virtual replication of historic experiments.

Limitations of the Wright Brothers’ Wind Tunnel Data

While revolutionary‚ the Wright brothers’ wind tunnel data had limitations. The scale of their models and wind tunnel size impacted the direct applicability of results to full-scale aircraft designs‚ requiring further adjustments.

Applicability to Full-Scale Aircraft

Despite the groundbreaking nature of the Wright brothers’ wind tunnel experiments‚ the data obtained faced limitations when applied to full-scale aircraft. The small size of the wind tunnel and the models tested introduced scale effects‚ meaning the aerodynamic characteristics observed might not perfectly translate to larger machines. Factors like Reynolds number‚ which describes the ratio of inertial forces to viscous forces in a fluid‚ differed significantly between the model scale and full scale. These differences affected airflow patterns and boundary layer behavior. Therefore‚ while the wind tunnel provided invaluable qualitative insights and comparative data‚ extrapolating precise quantitative values for full-scale performance required careful consideration and adjustments.

Modern Wind Tunnels and the Legacy of the Wright Brothers

Modern wind tunnels owe a great debt to the Wright brothers’ pioneering work. Facilities like MIT’s Wright Brothers Wind Tunnel demonstrate the enduring impact of their innovative approach to aerodynamic testing.

MIT’s Wright Brothers Wind Tunnel

The Massachusetts Institute of Technology (MIT) houses a wind tunnel named in honor of the Wright brothers‚ signifying their profound influence on aeronautical engineering. For over a century‚ MIT’s wind tunnels have been instrumental in aerospace and architecture research. Mark Drela‚ the Terry J. Kohler Professor‚ directs the Wright Brothers Wind Tunnel. It’s a valuable tool for examining various aspects of flight. The facility continues to be used for cutting-edge research‚ upholding the Wright brothers’ legacy of innovation and experimental rigor in aerodynamic study and design. This reinforces its place as a vital resource.

Wind Tunnel Tests of Wright Brothers Model B Airfoil

Wind tunnel tests of a Wright Model B airfoil have been conducted to study its aerodynamic properties. This study helps understand the airfoil’s contribution to successful manned flight.

Aerodynamic Study and Application to Successful Manned Flight

An historical and applied aerodynamic study of the Wright Brothers’ wind tunnel test program reveals its crucial application to achieving successful manned flight. The Wrights meticulously tested various airfoil designs within their wind tunnel‚ gathering data that significantly improved their aircraft’s performance. These tests allowed them to optimize wing camber and aspect ratio‚ directly contributing to the design of more efficient and controllable gliders and‚ ultimately‚ their powered aircraft. The data gathered was instrumental in overcoming the challenges faced with their earlier models.

moms on call 6-15 months schedule pdf

Moms on Call 6-15 Months Schedule PDF⁚ A Comprehensive Guide

This comprehensive guide delves into the Moms on Call (MOC) 6-15 months schedule, offering insights for parents seeking structured routines. Expect improved sleep patterns, potentially achieving 9-12 hours of uninterrupted sleep. We will unpack the benefits and areas of focus within the MOC approach.

Moms on Call (MOC) is a parenting resource developed by pediatric nurses, Laura Hunter and Jennifer Walker, offering guidance on establishing routines and schedules for infants and toddlers. The core philosophy centers around creating predictable days to foster better sleep habits, improved feeding, and overall well-being for both the child and the parents.

MOC provides structured schedules and practical advice. It helps parents navigate various stages of their child’s development, including the crucial 6-15 month period. This approach focuses on creating a foundation of consistency. It aims to alleviate the challenges that often accompany early parenthood. By following MOC principles, parents can anticipate their baby’s needs and respond effectively.

MOC can lead to a more harmonious family environment. The 6-15 month schedule is a key component. It addresses milestones, weaning, and transitioning to new feeding methods. The ultimate goal is to empower parents with the knowledge and tools. That will help to confidently guide their child through this important developmental phase. MOC aims to make parenting easier and more enjoyable.

Key Areas Covered in the 6-15 Month Resource

The Moms on Call (MOC) 6-15 month resource provides comprehensive guidance across several crucial areas of infant care and development. A primary focus is establishing and maintaining typical daily schedules. These schedules encompass feeding times, nap times, and wake windows, structured to promote predictability and routine for the baby.

Feeding schedules and sample menus are extensively covered. The resource offers practical advice on introducing solids, weaning strategies, and creating balanced, nutritious meals suitable for this age range. Transitioning to a sippy cup is another key area, with tips and techniques to facilitate a smooth and successful switch from bottle or breastfeeding.

Furthermore, the MOC resource addresses the important milestone of transitioning to a toddler bed. It provides guidelines on when and how to make this transition safely and comfortably. Common childhood illnesses are also discussed, offering parents information on identifying symptoms, providing appropriate care, and knowing when to seek professional medical advice. The resource serves as a valuable tool for navigating the challenges and joys of this developmental stage.

Typical Daily Schedules for 6-15 Month Olds

The Moms on Call (MOC) approach emphasizes structured daily schedules for infants aged 6-15 months, aiming to create predictability and promote healthy sleep habits. A typical day often includes three meals and two naps. These schedules evolve as the baby grows, adapting to changing needs and developmental milestones.

For younger infants within this age range, the schedule might involve an earlier morning wake-up, followed by a mid-morning nap, a midday meal, an afternoon nap, and then dinner with the family. As the baby approaches 12-15 months, the schedule may shift to accommodate longer wake windows and potentially a single, longer afternoon nap.

These schedules are not rigid but serve as a flexible framework. The key is to observe the baby’s cues and adjust the timing as needed, all while maintaining a consistent overall structure. By following these guidelines, parents can encourage better sleep patterns, improve feeding habits, and establish a sense of routine that benefits both the baby and the entire family.

Feeding Schedules and Sample Menus

Moms on Call (MOC) provides structured feeding schedules and sample menus designed to support optimal nutrition for babies aged 6-15 months. These resources aim to guide parents through the transition to solid foods and the establishment of healthy eating habits. The schedules typically incorporate three meals a day, strategically timed to align with nap times and wake windows.

Sample menus often include age-appropriate and nutritionally balanced options, such as pureed fruits and vegetables, cereals, and eventually, more complex combinations. The MOC approach emphasizes introducing new foods gradually and monitoring for any potential allergies or sensitivities. Portion sizes are also carefully considered, with guidelines provided to help parents determine appropriate amounts for their baby’s age and appetite.

Furthermore, MOC resources often include grocery lists to simplify meal planning and preparation. These lists typically feature whole, unprocessed foods, encouraging a focus on nutrient-rich options; By following these feeding schedules and sample menus, parents can ensure their babies receive the essential nutrients they need for healthy growth and development.

Weaning Guidance

The Moms on Call (MOC) approach provides structured weaning guidance for babies aged 6-15 months, supporting parents through the process of transitioning their little ones from breast milk or formula to solid foods. Weaning is a gradual process, and MOC emphasizes introducing new foods slowly and methodically. The guidance often includes age-appropriate timelines for introducing different food groups, such as fruits, vegetables, and proteins.

MOC stresses the importance of observing the baby’s cues for hunger and fullness, allowing them to dictate the pace of weaning. Parents are encouraged to offer a variety of textures and flavors to encourage acceptance of new foods. Purees are typically introduced first, gradually progressing to mashed and chopped foods as the baby develops their chewing skills.

The MOC weaning guidance also addresses common concerns, such as potential allergies or digestive issues. Parents are advised to introduce new foods one at a time, waiting a few days before introducing another, to monitor for any adverse reactions. The goal is to create a positive and enjoyable feeding experience for both the baby and the parents.

Transitioning to a Sippy Cup

The Moms on Call (MOC) program offers guidance on transitioning babies aged 6-15 months from bottles to sippy cups, a significant milestone in their development. This transition is crucial for developing fine motor skills and promoting independence. MOC emphasizes introducing the sippy cup gradually, starting with short periods of use during mealtimes. The program suggests offering water or breast milk in the sippy cup initially, rather than juice, to avoid developing a preference for sugary drinks.

MOC also provides tips on choosing the right sippy cup, recommending options with soft spouts that are gentle on the baby’s gums. Parents are encouraged to demonstrate how to use the sippy cup, showing the baby how to tip it up and drink from it. The guidance also addresses potential challenges, such as the baby refusing the sippy cup or difficulty mastering the sucking technique.

MOC advises parents to remain patient and persistent, offering the sippy cup consistently but without forcing it. It also suggests celebrating small successes and providing positive reinforcement to encourage the baby’s progress. The goal is to make the transition to a sippy cup a positive and stress-free experience for both the baby and the parents.

Transfer to Toddler Bed⁚ When and How

The Moms on Call (MOC) program provides guidance on transitioning a child from a crib to a toddler bed, typically between 6-15 months, considering individual readiness. MOC emphasizes assessing developmental milestones and emotional maturity before making the switch. Signs of readiness include climbing out of the crib, expressing a desire for a “big kid” bed, and demonstrating an understanding of boundaries.

MOC suggests creating a safe and comfortable sleep environment in the toddler bed, using familiar bedding and incorporating a nightlight if needed. Establishing a consistent bedtime routine is also crucial, helping the child feel secure and prepared for sleep. The program advises parents to remain patient and supportive during the transition, addressing any anxieties or fears the child may have.

MOC also provides strategies for managing potential challenges, such as the child getting out of bed repeatedly or resisting bedtime. Setting clear expectations and boundaries is essential, as well as consistently reinforcing those expectations. The goal is to make the transition to a toddler bed a positive and successful experience, promoting healthy sleep habits and fostering independence.

Addressing Common Illnesses

The Moms on Call (MOC) 6-15 month resource equips parents with the knowledge to confidently manage common childhood illnesses. This section focuses on identifying symptoms, providing appropriate care, and knowing when to seek professional medical advice. MOC emphasizes a practical, step-by-step approach to address ailments such as colds, fever, ear infections, and diaper rash.

MOC offers guidance on recognizing the signs of each illness, helping parents differentiate between mild discomfort and potentially serious conditions. The resource provides specific recommendations for at-home care, including adjusting feeding schedules, managing fever with appropriate medication dosages, and soothing discomfort with gentle remedies. Parents learn how to monitor their child’s symptoms and track their progress.

Furthermore, MOC clearly outlines when a doctor’s visit is necessary. This includes scenarios such as high fever, difficulty breathing, persistent vomiting, or any signs of dehydration. The resource empowers parents to make informed decisions about their child’s health, ensuring they provide timely and effective care. By following MOC’s guidance, parents can navigate common illnesses with confidence and promote their child’s well-being.

Sleep Training Tips and Techniques

The Moms on Call (MOC) approach to sleep training for 6-15 month olds prioritizes consistency and a structured environment to foster healthy sleep habits. This section details specific techniques designed to help babies achieve restful nights and predictable nap schedules. MOC emphasizes creating a calming bedtime routine, establishing consistent sleep cues, and teaching babies to self-soothe.

Key techniques include implementing a consistent bedtime routine, such as a bath, story, and lullaby, to signal to the baby that it’s time to sleep. MOC advises creating a dark, quiet, and cool sleep environment, free from distractions. Gradual withdrawal methods, where parents gradually decrease their presence in the room, are often recommended to encourage self-soothing.

MOC provides guidance on addressing common sleep challenges, such as night wakings and early morning risings. The resource emphasizes the importance of responding consistently to the baby’s cues while maintaining the established sleep schedule. Parents are encouraged to remain patient and persistent, understanding that sleep training requires time and dedication. By following MOC’s sleep training tips, parents can help their babies develop healthy sleep habits that benefit the entire family.

Developmental Milestones During 6-15 Months

The period between 6 and 15 months is a time of rapid development for infants, marked by significant milestones in motor skills, cognitive abilities, and social-emotional growth. This section outlines the typical developmental milestones that babies achieve during this phase, providing parents with a roadmap of what to expect and how to support their child’s progress.

Motor skills milestones include sitting independently, crawling, pulling up to stand, and eventually walking. Fine motor skills also develop, allowing babies to grasp objects, feed themselves with their fingers, and manipulate toys. Cognitive development is evident in the baby’s increasing curiosity, exploration of their environment, and understanding of cause and effect.

Language development accelerates, with babies babbling, imitating sounds, and eventually saying their first words. Social-emotional milestones include developing stranger anxiety, showing affection to caregivers, and engaging in simple games like peek-a-boo. Parents can support their child’s development by providing a stimulating environment, offering opportunities for exploration and play, and responding to their child’s cues and needs. Understanding these milestones helps parents to encourage growth.

Benefits of Following a Moms on Call Schedule

Adhering to a Moms on Call (MOC) schedule offers numerous advantages for both babies and their parents. One of the primary benefits is the establishment of consistent sleep patterns. Babies on a structured schedule often experience improved sleep quality, including longer stretches of nighttime sleep, potentially achieving 9-12 hours straight. This improved sleep not only benefits the baby but also allows parents to get much-needed rest, reducing exhaustion and improving overall well-being.

A predictable schedule can also lead to better feeding habits. Regular mealtimes help regulate the baby’s appetite, making feeding times more enjoyable and reducing fussiness. Furthermore, following an MOC schedule can promote independence and self-soothing skills in babies. The consistency of the routine allows babies to anticipate what comes next, which can reduce anxiety and promote a sense of security.

For parents, the benefits extend beyond improved sleep and feeding. An MOC schedule can bring structure and predictability to the day, making it easier to plan activities and manage household tasks. It can also reduce parental stress and anxiety, as parents feel more in control and confident in their ability to care for their baby.

Where to Find Moms on Call Resources

Locating Moms on Call (MOC) resources is quite straightforward, with various avenues available to parents seeking guidance. One of the primary sources is the official Moms on Call website. This website serves as a central hub for information, offering a wealth of articles, tips, and downloadable schedules. You can also find details about their consulting services and connect with certified MOC consultants for personalized support.

Another excellent resource is the Moms on Call series of parenting books. These books, including “Next Steps Baby Care 6-15 Months,” provide comprehensive information on sleep training, feeding schedules, and developmental milestones. They can be purchased online through retailers like Amazon or at major bookstores.

Social media platforms also offer access to MOC resources. Following Moms on Call on platforms like Facebook and Instagram allows you to stay updated on their latest tips, advice, and promotions. These platforms often host live Q&A sessions with MOC experts, providing an opportunity to get your specific questions answered. Online parenting forums and communities can also be valuable sources of information, where parents share their experiences and tips for implementing the MOC schedule.