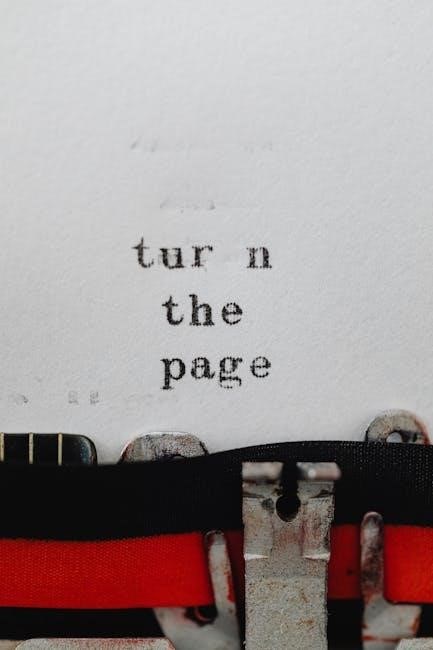
2008 honda accord v6 manual

2008 Honda Accord V6 Manual⁚ A Comprehensive Guide

Welcome to a comprehensive guide focusing on the 2008 Honda Accord V6, specifically tailored for owners and enthusiasts seeking in-depth knowledge of this popular vehicle. This guide will cover various aspects, from engine specifications to common issues and maintenance.

Overview of the 2008 Honda Accord V6

The 2008 Honda Accord V6 is a mid-size sedan, known for its reliability, performance, and comfortable ride. It stands out due to its robust 3.5-liter V6 engine, offering a compelling blend of power and refinement, making it a popular choice among drivers seeking more than just basic transportation. Available both as a sedan and a coupe, the Accord V6 provides versatility to suit different lifestyles.

This generation of the Accord, the eighth, introduced a more modern design and improved features. The V6 variant, in particular, offers enhanced performance compared to the base four-cylinder model. It’s a car that delivers a satisfying driving experience and a reputation for durability. Many owners praise its smooth transmission and responsive handling. However, like any vehicle, it has its share of common issues, which we will explore later in this guide.

Whether you’re a seasoned owner or considering purchasing a 2008 Honda Accord V6, understanding its strengths and weaknesses is crucial for ensuring its long-term reliability and enjoyment. This guide aims to provide you with all the essential information you need.

Engine and Performance Specifications

The heart of the 2008 Honda Accord V6 is its 3.5-liter V6 engine, which delivers a substantial boost in power compared to the base four-cylinder model. This engine produces approximately 268 to 271 horsepower, depending on the specific trim level and transmission configuration. The engine also generates around 250 lb-ft of torque, providing strong acceleration and confident passing power on the highway.

This V6 engine features Honda’s i-VTEC technology, which optimizes valve timing for improved performance and fuel efficiency. The Accord V6 is typically paired with either a five-speed automatic transmission or, in some versions, a six-speed manual transmission, offering drivers a choice between convenience and greater control. The automatic transmission provides smooth and seamless shifts, while the manual transmission enhances the driving experience with more engaging gear changes.

Fuel economy for the 2008 Honda Accord V6 is respectable for its class, with EPA ratings typically around 19 mpg in the city and 29 mpg on the highway. Real-world fuel economy may vary depending on driving habits and conditions. Overall, the engine and performance specifications of the 2008 Honda Accord V6 make it a compelling choice for drivers.

Manual Transmission Specifics

The 2008 Honda Accord V6, equipped with a manual transmission, offers a unique and engaging driving experience. Specifically, some coupe versions were available with a six-speed manual, providing precise gear changes and enhanced control. This setup is favored by driving enthusiasts who appreciate the direct connection between the engine and the wheels.

The manual transmission in the Accord V6 is designed to handle the engine’s power and torque effectively. It allows drivers to extract the most performance from the 3.5-liter V6 engine, making it more responsive and fun to drive. The gear ratios are carefully chosen to provide a balance between acceleration and fuel efficiency, while the clutch offers a good feel and engagement point.

Proper shifting techniques are essential to maximizing the life and performance of the manual transmission. Regular maintenance, including fluid changes, is also crucial. While generally reliable, manual transmissions can experience issues such as gear grinding or difficulty shifting if not properly maintained or driven aggressively. Owners should consult the service manual for recommended maintenance intervals and procedures;

Common Problems and Issues

While the 2008 Honda Accord V6 is generally a reliable vehicle, certain common problems and issues have been reported by owners; These can range from minor inconveniences to more significant mechanical concerns; One notable issue involves the brakes, with some owners experiencing premature wear or noise. Additionally, problems with the accessories and interior components have been noted, indicating potential quality concerns with certain materials.

Engine-related issues, such as oil consumption and misfires, have also been reported in some cases. The V6 engine utilizes a timing belt, which requires replacement at recommended intervals to prevent engine damage. Power steering problems, particularly a lack of assistance at low speeds, have been observed by some owners, although fluid levels are correct.

Other common issues include ignition switch failures and AC problems. Transmission issues, while less frequent in manual models compared to automatics, can still occur, manifesting as gear grinds or difficulty shifting. Addressing these problems promptly and adhering to a regular maintenance schedule can help mitigate their impact and ensure the longevity of the vehicle.

Maintenance and Repair

Maintaining your 2008 Honda Accord V6 is crucial for its longevity and optimal performance. Regular oil changes are essential, and it’s important to check the oil level frequently as there is no warning light for low oil. The V6 engine has a timing belt that requires periodic replacement to prevent catastrophic engine damage. Consult the service manual for the recommended interval.

Brake maintenance is also vital, including regular inspections of pads and rotors. Addressing issues like premature wear or noise promptly can prevent further damage. For the manual transmission, ensure proper fluid levels and consider fluid changes according to the recommended schedule. Power steering issues should be investigated, checking for leaks or pump malfunctions.

When performing repairs, using quality parts, whether aftermarket or Honda OEM, is recommended. If you are not comfortable performing certain maintenance or repair tasks, seek the assistance of a qualified mechanic. Accessing the service manual will provide detailed instructions and specifications for various procedures, aiding in accurate and effective maintenance and repair.

Timing Belt Replacement

The 2008 Honda Accord V6 engine utilizes a timing belt, a critical component that requires replacement at specific intervals to prevent severe engine damage. Neglecting this maintenance item can lead to the belt snapping, potentially causing pistons and valves to collide, resulting in costly repairs. Refer to your owner’s manual or service manual for the recommended replacement interval, typically around 60,000 to 100,000 miles.

When replacing the timing belt, it’s wise to also replace other related components such as the water pump, tensioner, and idler pulleys. Replacing these parts simultaneously ensures optimal performance and prevents future failures. The water pump is often driven by the timing belt, so replacing it during this service is a proactive measure.

The timing belt replacement procedure is complex and requires specialized tools and knowledge. If you lack experience, it’s best to entrust this task to a qualified mechanic. The cost of timing belt replacement can range from $1200 to $1500, depending on the parts used and labor rates.

Shifting Techniques for Manual Transmission

Mastering the manual transmission in your 2008 Honda Accord V6 enhances driving enjoyment and control. Smooth shifting involves coordinating the clutch, throttle, and gear lever. The goal is to achieve seamless transitions between gears without jerking or stalling. Start by fully depressing the clutch pedal before shifting.

When upshifting, release the throttle slightly while simultaneously pressing the clutch. Move the gear lever to the next higher gear and smoothly release the clutch while gradually applying throttle. Avoid “dumping” the clutch, which can cause the car to lurch. Downshifting requires matching the engine speed to the road speed. Before downshifting, blip the throttle to raise the engine RPMs slightly, then engage the lower gear.

Proper shifting techniques not only improve driving comfort but also prolong the life of your clutch and transmission. Pay attention to engine sounds and vehicle speed to determine the optimal shift points. Practice makes perfect, so dedicate time to refining your shifting skills. If you’re new to manual transmissions, consider seeking guidance from an experienced driver. A smooth, well-executed shift is a rewarding experience.

Availability of Service Manuals

Access to a comprehensive service manual is invaluable for owners of the 2008 Honda Accord V6, especially those who prefer to perform their own maintenance and repairs. Fortunately, several resources exist to obtain these manuals. Honda itself often provides official service manuals through authorized dealerships or online platforms like Honda Owner Link. These manuals contain detailed diagrams, troubleshooting guides, and step-by-step instructions for various repair procedures.

In addition to official Honda resources, aftermarket service manuals from publishers like Haynes and Chilton are widely available. These manuals offer a more general approach but can still be helpful for common maintenance tasks. Online marketplaces such as Amazon and eBay are good places to search for both official and aftermarket manuals. Digital versions of service manuals are also becoming increasingly popular, often available as PDF downloads.

When choosing a service manual, ensure it specifically covers the 2008 Honda Accord V6 model year. A V6 supplement manual might be necessary in addition to the standard Accord manual. Having the correct manual will save time and prevent potential errors during repairs.

Owner Reviews and Reliability

The 2008 Honda Accord V6 has garnered a significant number of owner reviews, providing valuable insights into its long-term reliability and potential issues. Many owners praise the V6 engine for its robust performance and smooth power delivery, often describing it as a “sleeper” capable of keeping up with sportier cars. The manual transmission, when equipped, is also generally well-regarded for its engaging driving experience.

However, like any vehicle, the 2008 Accord V6 is not without its drawbacks. Some common concerns reported by owners include excessive oil consumption, particularly in higher-mileage examples. Issues with the power steering system, such as stiffness or noise, have also been noted. Additionally, certain owners have reported problems with the brakes, air conditioning, and ignition switch.

Overall, the 2008 Honda Accord V6 is considered a reliable vehicle, but potential buyers should be aware of these potential issues. Checking the vehicle’s maintenance history and conducting a thorough inspection before purchase is crucial. Addressing any existing problems promptly can help ensure many years of enjoyable ownership.

kidde kn coeg 3 manual

Kidde KN-COEG-3 Manual⁚ Comprehensive Guide

Welcome to the comprehensive guide for the Kidde KN-COEG-3, a combination carbon monoxide and explosive gas alarm. This manual provides essential information for safe operation, proper maintenance and thorough understanding of the device’s capabilities, ensuring safety in your home or workplace.

The Kidde KN-COEG-3 is a vital safety device designed to protect your home and family from two potentially deadly threats⁚ carbon monoxide (CO) and explosive gases. This combination alarm offers peace of mind by continuously monitoring the air and providing an early warning system for these hazardous conditions.

This user manual is intended to provide a comprehensive understanding of the KN-COEG-3, including its features, operation, maintenance, and troubleshooting. Reading this manual thoroughly is essential for ensuring proper use and maximizing the effectiveness of the alarm. It should be saved for future reference and passed on to any subsequent owner.

The KN-COEG-3 is equipped with both a carbon monoxide sensor and an explosive gas sensor. It also features a digital display that shows CO levels in parts per million (PPM), allowing users to monitor the concentration of CO in their environment; The device operates on 120V AC power with a 9V battery backup for continuous protection during power outages.

With its user-friendly design, the KN-COEG-3 is easy to install and operate. It includes a test/reset button for convenient testing of the alarm’s functionality. Understanding its features and following the guidelines in this manual will help you create a safer living environment.

Key Features of the KN-COEG-3

The Kidde KN-COEG-3 combination alarm is packed with features designed to provide reliable protection against carbon monoxide and explosive gas hazards. One of its standout features is its dual-sensor technology, integrating both a carbon monoxide (CO) sensor and an explosive gas sensor into a single unit. This provides comprehensive coverage, ensuring that both types of threats are detected promptly.

The KN-COEG-3 includes a digital display that shows real-time CO levels in parts per million (PPM); This allows users to monitor the concentration of CO in their environment and take appropriate action if levels become dangerous. The display provides a clear and easy-to-understand readout of the CO levels detected.

The alarm operates on a 120V AC power supply but also includes a 9V battery backup. This ensures continuous operation even during power outages, providing uninterrupted protection. The battery backup feature is crucial for maintaining safety during emergencies when the main power source is unavailable.

The KN-COEG-3 also features a test/reset button, allowing users to easily test the alarm’s functionality and silence nuisance alarms. The alarm has an 85dB sound which provide a clear audible alert when CO or explosive gas is detected, ensuring that occupants are promptly notified of the danger.

Understanding Carbon Monoxide (CO) Detection

Carbon monoxide (CO) is an odorless, colorless gas produced by the incomplete combustion of fuels such as natural gas, propane, oil, wood, and coal. Because it is undetectable by human senses, CO can quickly reach dangerous levels without anyone knowing. The Kidde KN-COEG-3 is designed to detect these dangerous CO levels and alert you before they become life-threatening.

The KN-COEG-3 measures CO concentration in parts per million (PPM), displaying the level on its digital screen. It is important to understand the correlation between PPM levels and the associated health risks. Low levels of CO might not trigger an alarm immediately but can cause symptoms with prolonged exposure. Higher levels trigger an alarm more quickly, indicating an immediate danger.

The alarm is designed to sound based on the concentration of CO and the duration of exposure, adhering to established safety standards. Regular testing of the alarm is crucial to ensure it functions correctly. Familiarize yourself with the different CO levels and the corresponding alarm responses to understand when to take action.

Understanding CO detection is essential for protecting yourself and your family. The KN-COEG-3 serves as a vigilant monitor, providing an early warning system against the silent threat of carbon monoxide poisoning.

Explosive Gas Detection Capabilities

The Kidde KN-COEG-3 is not only a carbon monoxide detector but also an explosive gas detector, providing dual protection against potential household hazards. This capability allows the device to detect the presence of explosive gases like natural gas (methane) and propane, which can accumulate and create a significant risk of explosion.

These gases are commonly used for heating, cooking, and other household appliances. Leaks can occur due to faulty appliances, damaged pipes, or improper installation. Since these gases are often odorless, detecting them requires specialized equipment like the KN-COEG-3.

The detector is designed to sense the concentration of these gases in the air. When the concentration reaches a hazardous level, the alarm will sound, providing an early warning. It is crucial to understand that any gas leak, no matter how small, should be addressed immediately by a qualified technician.

Regularly testing the explosive gas detection function of the KN-COEG-3 is essential to ensure it is working correctly. This dual functionality provides peace of mind, knowing that your home is protected from both carbon monoxide and potentially explosive gas leaks. Early detection can prevent catastrophic events and safeguard your property and lives.

Alarm Characteristics and Sound Levels (85 dB)

The Kidde KN-COEG-3 features a distinct alarm sound designed to alert occupants to the presence of carbon monoxide or explosive gases. The alarm is characterized by a loud, pulsating pattern intended to wake individuals, even from sleep. The sound level is calibrated to 85 decibels (dB), which is comparable to the sound of a busy street or a loud vacuum cleaner.

This sound level is crucial because it is loud enough to penetrate through closed doors and other barriers within a typical home environment. When the alarm detects dangerous levels of carbon monoxide or explosive gas, it will emit this 85 dB sound, signaling the need for immediate action.

The alarm’s sound pattern is specifically designed to be different from other household alarms, such as smoke detectors, to avoid confusion during an emergency. The distinct pattern helps occupants quickly identify the source of the danger and respond accordingly. It’s important to familiarize yourself with the specific sound of the KN-COEG-3 alarm during routine testing.

Regular testing ensures that the alarm is functioning correctly and that occupants can recognize the warning signal. In the event of an alarm, it is crucial to follow the safety guidelines outlined in the user manual to ensure everyone’s well-being. The 85 dB alarm serves as a critical warning system.

Using the Test and Reset Button

The Kidde KN-COEG-3 features a combined test and reset button, crucial for ensuring the device’s proper functionality and for silencing the alarm after a detected event. Regularly testing the alarm verifies that the sensors, sounder, and battery are working correctly. To test the alarm, simply press and hold the test/reset button.

Upon pressing the button, the alarm should emit a short series of beeps, indicating that the sounder is functional. The digital display should also activate, confirming the electronic components are operational. This test should be performed weekly to guarantee continuous protection. If the alarm fails to sound during the test, refer to the troubleshooting section.

In the event of an alarm caused by detected carbon monoxide or explosive gases, the test/reset button can be used to silence the alarm once the environment is deemed safe. After addressing the source of the gas leak or ventilating the area, press the button to stop the alarm from sounding.

It’s important to note that silencing the alarm does not resolve the underlying issue; it only temporarily stops the sound. Investigate and correct the problem before relying on the reset function. The test/reset button is an essential component for maintaining the effectiveness of the Kidde KN-COEG-3, providing both a means of verification and a method to manage alarm events.

Interpreting the Digital Display (PPM Levels)

The Kidde KN-COEG-3 is equipped with a digital display that shows carbon monoxide (CO) levels in parts per million (PPM). Understanding these PPM levels is crucial for assessing the severity of CO presence and taking appropriate action. The display provides real-time information, allowing you to monitor fluctuations in CO concentration.

Generally, a reading of 0 PPM indicates no detectable CO. Low levels, typically between 1-70 PPM, may not trigger immediate alarm but suggest the presence of CO and warrant investigation. Mid-range levels, around 70-150 PPM, indicate a potential hazard and could trigger an alarm, advising ventilation and source identification.

High levels, exceeding 150 PPM, represent a dangerous situation requiring immediate evacuation and professional assistance. The alarm will sound more urgently at these levels. The display also features a peak level memory, recording the highest CO concentration detected, aiding in identifying intermittent CO sources.

Regularly check the display for any unusual readings. Remember, even low PPM levels can be harmful over extended periods. Familiarize yourself with the correlation between PPM levels and potential health risks, ensuring you can effectively interpret the digital display and respond appropriately to protect yourself and others from CO poisoning.

Maintenance and Battery Information (9V Backup)

Proper maintenance of your Kidde KN-COEG-3 is essential for reliable operation. Regularly dust the exterior with a soft cloth to keep vents clear for accurate gas detection. Never use water, cleaners, or solvents, as they can damage the sensor. Test the alarm weekly using the test button to ensure the sensor, alarm, and battery are functioning correctly.

The KN-COEG-3 operates on a 120V AC power source but includes a 9V battery backup for continuous protection during power outages. Replace the 9V battery at least once a year, or immediately when the alarm chirps, indicating low battery. Use only a fresh, recognized brand 9V alkaline battery for optimal performance.

When replacing the battery, ensure correct polarity. A low battery can compromise the alarm’s ability to detect CO and explosive gases. The battery compartment is typically located on the back or side of the unit, easily accessible for battery replacement.

Note the manufacturing date on the unit. Kidde recommends replacing the entire KN-COEG-3 unit every 5-7 years for optimal performance, as sensor sensitivity diminishes over time. Record the replacement date for future reference. Regular maintenance and timely battery replacement are crucial for ensuring continuous protection against CO and explosive gas hazards.

Troubleshooting Common Issues

Encountering issues with your Kidde KN-COEG-3? Here’s a guide to troubleshooting common problems. If the alarm chirps intermittently, it usually indicates a low battery. Replace the 9V battery immediately with a fresh one. If the chirping persists after battery replacement, the unit may require replacement.

False alarms can occur due to temporary high levels of CO from sources like a car starting in an attached garage or nearby appliances. Ventilate the area and press the reset button. If false alarms continue, inspect potential CO sources and ensure proper ventilation.

If the digital display shows error codes, consult the user manual for specific error code definitions and recommended actions. Ensure the unit is properly plugged into a functioning 120V AC outlet. Check the circuit breaker to ensure power is being supplied to the outlet.

If the alarm fails to sound during a test, verify that the battery is correctly installed and has sufficient charge. If the unit still fails to respond, it may be defective and require replacement. For persistent issues or concerns, contact Kidde customer support or a qualified technician for assistance. Remember, never ignore an alarm, and always prioritize safety.

Where to Download the KN-COEG-3 User Manual (PDF)

Accessing the official Kidde KN-COEG-3 user manual in PDF format is crucial for comprehensive understanding and troubleshooting. The easiest way to obtain the manual is by visiting the official Kidde website. Navigate to the “Support” or “Product Documentation” section and search for the KN-COEG-3 model.

Alternatively, you can perform a web search using keywords like “Kidde KN-COEG-3 user manual PDF” to find direct download links from reputable sources. Be cautious of unofficial websites and ensure the downloaded file is from a trusted source to avoid malware or incorrect information.

Many online appliance manual databases also host the KN-COEG-3 manual. Websites such as ManualsOnline or similar platforms often provide user manuals for various devices, including the Kidde KN-COEG-3.

Once you’ve located the PDF, download and save it to your computer or mobile device for easy access. Having a digital copy allows you to quickly reference instructions, troubleshooting steps, and important safety information whenever needed. Remember to keep a backup of the manual for future reference.

eufy robovac 30c manual

Eufy RoboVac 30C Manual⁚ A Comprehensive Guide

Welcome to your ultimate resource for mastering the Eufy RoboVac 30C! This guide provides everything from setup to troubleshooting, ensuring optimal performance and longevity․ Access manuals and instructions effortlessly for seamless operation․

The Eufy RoboVac 30C is designed to efficiently and autonomously clean your home․ Its compact size allows it to navigate under furniture and reach difficult areas, providing a thorough clean․ This comprehensive guide offers instructions and information to maximize your RoboVac 30C’s potential, covering everything from initial setup to advanced features․

This guide will help you use the EufyHome app, enabling control via mobile or voice commands through Amazon Alexa and Google Assistant․ Learn about cleaning modes, boundary strips, and essential maintenance for lasting performance․ Safety instructions and troubleshooting tips will also be provided․

Whether you’re a new user or seeking to deepen your understanding, this guide ensures your RoboVac 30C operates at its best․ Access user manuals and other documents, ensuring seamless operation and optimal cleaning results․

Eufy RoboVac 30C⁚ Unboxing and Setup

Get ready to experience the convenience of your Eufy RoboVac 30C! This section guides you through unboxing, initial setup, and charging, ensuring a smooth start to automated cleaning․

Initial Setup and Charging

Begin by unpacking your Eufy RoboVac 30C and verifying all components are present, including the RoboVac, charging base, power adapter, boundary strips, and extra filters․ Before the first use, it’s crucial to fully charge the RoboVac․ Locate the charging base and position it against a wall on a level surface, ensuring ample space around it․
Connect the power adapter to the charging base and plug it into a power outlet․ The indicator light on the charging base should illuminate․ Now, place the RoboVac manually onto the charging base, aligning the charging contacts․ Allow the RoboVac to charge for at least 5 hours until the indicator light turns solid blue, signifying a full charge․

This initial charging ensures optimal battery performance and prepares your RoboVac 30C for efficient cleaning․ A fully charged RoboVac is ready to tackle dirt, dust, and debris throughout your home․

Attaching RoboVac to the Charging Base

Properly attaching your Eufy RoboVac 30C to the charging base is essential for maintaining its battery life and ensuring it’s always ready for cleaning․ First, ensure the charging base is correctly positioned against a wall on a hard, level surface, with enough clear space around it as described previously․ The power adapter should be securely connected, and the base should be powered on․

To attach the RoboVac, gently align its charging pins located on its underside with the corresponding charging contacts on the base․ You should feel a slight magnetic pull as they connect․ The RoboVac will emit a sound or display a light to indicate it’s properly docked․

Regularly check that the RoboVac is securely attached to the base․ This guarantees consistent charging, preventing the device from running out of power unexpectedly during a cleaning cycle․ A well-connected RoboVac is a happy, efficient RoboVac!

Eufy RoboVac 30C⁚ Features and Functionality

Explore the impressive features of the RoboVac 30C! From its cleaning modes to boundary strip usage, learn how to maximize its capabilities for a spotless home․

Cleaning Modes and Operation

The Eufy RoboVac 30C offers versatile cleaning modes to suit various floor types and cleaning needs․ Auto mode provides a balanced cleaning approach, intelligently navigating your home․ Spot cleaning concentrates on specific areas needing extra attention, ensuring thorough dirt removal․ Edge mode focuses on cleaning along walls and corners, often missed by standard vacuuming․

Manual control is also available via the EufyHome app, offering customized cleaning paths․ Scheduled cleaning allows you to set specific times for RoboVac to operate, maintaining cleanliness effortlessly․ Understanding these modes and their optimal use ensures your RoboVac 30C delivers exceptional cleaning performance․ Utilizing these features properly will extend the life of your RoboVac․

Using Boundary Strips

Boundary strips are an essential component for maximizing the effectiveness of your Eufy RoboVac 30C․ These strips create virtual barriers, preventing the RoboVac from entering unwanted areas․ They are perfect for cordoning off pet areas, delicate furniture, or rooms you prefer RoboVac to avoid․

To use boundary strips, simply cut them to the desired length and place them on the floor to define the restricted zone․ Ensure the strips are flat and securely adhered to the floor surface․ RoboVac will detect the magnetic field and automatically turn away, respecting the boundary․ This feature offers a simple, yet effective way to customize your RoboVac’s cleaning area, providing peace of mind and preventing accidental damage․ They help you control the exact area for your RoboVac to clean․

Eufy RoboVac 30C⁚ Connecting to the EufyHome App

Connecting your RoboVac 30C to the EufyHome app unlocks advanced control and customization․ Enjoy remote operation, scheduling, and real-time monitoring, enhancing your cleaning experience;

Wi-Fi Setup and App Integration

To fully utilize your Eufy RoboVac 30C’s smart features, connecting it to your home Wi-Fi network and integrating it with the EufyHome app is crucial․ This process allows for remote control, scheduling, and monitoring of your RoboVac from anywhere․ First, ensure your RoboVac is charged and within range of your Wi-Fi router․ Download the EufyHome app from the App Store or Google Play Store and create an account․

Next, follow the in-app instructions to add your RoboVac 30C․ This typically involves pressing a combination of buttons on the RoboVac to initiate pairing mode․ The app will then guide you through selecting your Wi-Fi network and entering your password․ Once connected, you can customize cleaning schedules, adjust suction power, and receive notifications about your RoboVac’s status, making cleaning more convenient․ Proper setup ensures seamless voice control via Alexa or Google Assistant as well․

Voice Control with Amazon Alexa and Google Assistant

Enhance your Eufy RoboVac 30C experience by integrating voice control through Amazon Alexa and Google Assistant․ After successfully connecting your RoboVac to the EufyHome app, enabling voice control is straightforward; For Alexa, open the Alexa app, search for the “EufyHome” skill, and enable it․ You’ll be prompted to link your EufyHome account to Alexa․ Once linked, you can use voice commands such as “Alexa, start RoboVac” or “Alexa, stop RoboVac․”

Similarly, for Google Assistant, open the Google Home app and navigate to “Add device․” Choose “Works with Google” and search for “EufyHome․” Link your EufyHome account, and you can then use commands like “Hey Google, start cleaning” or “Hey Google, turn off RoboVac․” These integrations provide a hands-free way to control your RoboVac, making cleaning even more convenient and seamless․ Remember to use clear and concise commands for optimal performance․

Eufy RoboVac 30C⁚ Maintenance and Troubleshooting

Ensure your RoboVac 30C runs smoothly with proper maintenance․ This section covers cleaning, replacing parts like brushes and filters, and troubleshooting common issues for optimal performance and longevity․

Cleaning and Replacing Parts (Side Brushes, Filters)

Maintaining your Eufy RoboVac 30C involves regular cleaning and timely replacement of parts to ensure optimal performance․ Focus on the side brushes and filters, as they directly impact cleaning efficiency․ Regularly inspect the side brushes for tangled hair or debris, gently removing any obstructions to maintain their effectiveness․ Replacement should occur every 6-12 months, depending on usage․

The filter is crucial for trapping dust and allergens, preventing them from recirculating into your home․ Clean the filter every two weeks by tapping it against a trash bin to remove loose particles․ Replacement is recommended every 2-3 months to maintain strong suction power and air purification․ Neglecting these maintenance tasks can lead to reduced cleaning performance, increased noise levels, and potential damage to the RoboVac․ Always refer to the user manual for specific instructions and recommended replacement schedules․ Proper care ensures your RoboVac 30C continues to provide efficient and reliable cleaning for years to come․

Troubleshooting Common Issues

Encountering issues with your Eufy RoboVac 30C is inevitable, but most problems are easily resolved with simple troubleshooting steps․ If the RoboVac isn’t charging, ensure the power switch underneath is turned on and that the charging pins are correctly aligned with the base․ Check the charging base connection and replace if necessary․

For weak suction, clean the filter and dustbin, and inspect the brushes for obstructions․ If the RoboVac gets stuck frequently, consider using boundary strips to restrict access to problematic areas․ If the device displays error messages, consult the manual for specific codes and solutions․ A common issue is the side brush ceasing to spin, in this case, inspect and clear any blockages․
If Wi-Fi connectivity is unstable, ensure your router is compatible and the RoboVac is within range․ For persistent problems, a factory reset might be necessary; refer to the manual for instructions․ If issues persist, contact Eufy customer support for further assistance, ensuring you have the model number and a detailed description of the problem at hand․

Eufy RoboVac 30C⁚ Safety Instructions

Prioritize safety when using your RoboVac 30C․ Always read and understand the instructions before operation․ Keep the device away from wet areas and avoid picking up liquids to prevent damage․

Important Safety Guidelines

Before operating your Eufy RoboVac 30C, carefully review these safety guidelines to minimize risks of injury or damage․ Ensure the power switch is off during maintenance․ Avoid using the RoboVac in wet or damp environments to prevent electrical hazards․ Do not allow children or pets to operate the RoboVac unsupervised․

Regularly inspect the charging base and power cord for any signs of damage․ If damage is detected, cease use immediately and contact Eufy support․ Never attempt to disassemble or repair the RoboVac yourself, as this could void the warranty and pose safety risks․ Keep the RoboVac away from flammable materials and open flames․ Use only Eufy-approved replacement parts and accessories․ Always supervise the RoboVac when it is cleaning near delicate objects or areas with potential hazards like stairs․ Following these guidelines will ensure safe and efficient operation of your Eufy RoboVac 30C․

Eufy RoboVac 30C⁚ Manuals and Downloads

Easily access user manuals and essential documents for your Eufy RoboVac 30C․ Download PDF guides for setup, maintenance, and troubleshooting, ensuring optimal performance and longevity of your device․

Accessing User Manuals and Other Documents

Finding the right information for your Eufy RoboVac 30C is crucial for effective use and maintenance․ User manuals, quick start guides, and other support documents are readily available online for download․ These resources typically include detailed instructions on setup, operation, cleaning, and troubleshooting․

To access these documents, visit the official Eufy website and navigate to the support section․ Search for your specific model, RoboVac 30C, to find a list of available manuals and guides․ These documents are usually in PDF format, making them easy to download and view on any device․

Additionally, many third-party websites offer user manuals for various electronic devices, including the Eufy RoboVac 30C․ However, it’s always best to obtain manuals from the official Eufy website to ensure accuracy and completeness․ Keep these documents handy for quick reference whenever you need assistance with your RoboVac 30C․

mercury marine service manual pdf

Mercury Marine Service Manual PDF⁚ A Comprehensive Guide

To get a printed Mercury Marine Service Manual, visit the official Mercury Marine website or authorized dealers. These manuals are tailored for specific engines, ensuring accurate information. Always use a factory service manual.

Understanding Mercury Marine Service Manuals

Mercury Marine service manuals are essential guides created by Mercury Marine’s service department to aid mechanics and service personnel in maintaining and repairing Mercury outboard and MerCruiser engines. These manuals provide detailed information, specifications, and step-by-step instructions for various maintenance and repair tasks. They cover a range of engine models and horsepower, offering comprehensive support for ensuring the proper functioning and longevity of Mercury Marine products. Accessing and understanding these manuals is crucial for anyone performing service or repairs on Mercury engines, whether a professional technician or a boat owner.

Importance of Using a Factory Service Manual

Factory service manuals ensure jobs are done right the first time, as they contain the specific procedures and information used by factory technicians. These manuals are an invaluable resource.

Ensuring Correct Repairs and Maintenance

Using a factory service manual is crucial for ensuring correct repairs and maintenance of Mercury Marine engines. These manuals provide detailed, step-by-step instructions, specifications, and diagrams specific to your engine model. Following these guidelines helps prevent further damage and ensures optimal performance. A service manual will help you understand the complexities and specific needs, which will aid in correct repairs and maintenance of your engine and boat. This level of detail will reduce complications.

Locating the Correct Service Manual for Your Engine

Finding the right service manual requires knowing your engine’s model and serial numbers. This ensures that the manual contains accurate information specific to your engine’s components and systems.

Specifying Model and Serial Numbers

When seeking a Mercury Marine service manual, providing the correct model and serial numbers is crucial. These identifiers pinpoint the exact engine version, ensuring the manual aligns with its specific components and systems. Mercury Marine uses these numbers to track engine specifications, revisions, and manufacturing details.
Accurate identification guarantees the service manual contains the precise procedures and diagrams needed for proper maintenance and repairs. Without this detailed information, technicians risk using incorrect methods, potentially causing damage or ineffective repairs. Always double-check these numbers before ordering or downloading a manual.

Where to Find Mercury Service Manuals

Mercury service manuals are available through online resources and printed versions. Check the Mercury Marine website or authorized dealers for official manuals. Third-party retailers also offer options.

Online Resources and Printed Versions

Finding Mercury service manuals involves exploring both online resources and traditional printed versions. Digital manuals offer convenience and accessibility, allowing users to quickly search for specific information. The Mercury Marine website provides a gateway to downloadable manuals and product brochures. Additionally, various online platforms offer digital service manuals for different Mercury engine models.
For those who prefer a tangible resource, printed service manuals are available for purchase. Official Mercury dealers and authorized retailers stock these manuals, ensuring accuracy and comprehensive coverage for specific engine types. Check online for buying options.

Digital vs. Printed Service Manuals

Digital service manuals offer searchability and accessibility, while printed manuals provide a tangible, reliable resource. Choosing depends on preference and usage context for Mercury Marine engine maintenance.

Advantages of Each Format

Digital service manuals for Mercury Marine engines offer benefits like easy search functionality, portability across devices, and instant access. They are great for quick lookups and field repairs. Printed manuals provide a durable, hands-on resource without needing power, suitable for detailed shop work. The best choice relies on individual needs and work environments, balancing convenience with reliability, so consider where you use your manual before purchasing.

Key Sections Typically Found in a Mercury Service Manual

Mercury service manuals include vital sections. One key section is specifications and information. This provides essential data for proper maintenance and repair of Mercury Marine engines and related components.

Specifications and Information

A critical component of any Mercury Marine service manual lies in its detailed specifications and essential information. This section meticulously outlines the precise measurements, tolerances, and material requirements necessary for maintaining and repairing Mercury outboards and MerCruiser engines. Technicians rely on these specifications to ensure that all work meets factory standards, preserving engine performance and longevity. Proper adherence to these guidelines helps prevent future mechanical issues, thus ensuring the continued reliability and safety of the marine equipment. Moreover, this section often includes wiring diagrams and torque specifications, indispensable for accurate repairs.

Using Service Manuals for Troubleshooting

Service manuals provide step-by-step guidance for diagnosing issues. They contain troubleshooting charts, diagnostic codes, and testing procedures. This ensures mechanics can efficiently identify and fix problems, which is very important.

Step-by-Step Repair Procedures

Mercury service manuals meticulously detail repair processes with step-by-step instructions; These procedures often include diagrams, torque specifications, and required tools. Following these instructions ensures repairs are done correctly and safely. Manuals cover everything from simple maintenance to complex overhauls. Technicians can confidently tackle repairs, reducing errors and improving efficiency. Proper adherence to these procedures is crucial for maintaining engine performance and longevity. A service manual is created to help the staff with assistance.

Mercury Outboard Service Manual Coverage

Mercury Outboard Service Manuals cover a wide range of horsepower (HP) and model years. These manuals provide specific information for various engine types, ensuring accurate repair and maintenance guidance.

HP Ranges and Model Years

Mercury outboard service manuals are available for a vast range of engine sizes, typically spanning from 2 HP to 300 HP, or even higher in some cases. Coverage extends across numerous model years, with manuals often grouped by production periods (e.g., 1965-1989, 2001-2014). When selecting a manual, be sure to verify that it includes the specific HP range and model year of your particular Mercury outboard engine. This ensures the information is accurate and relevant for your needs and model.

Ordering Printed Service Manuals

To order a printed Mercury Marine service manual, visit the official Mercury Marine website or authorized dealers. These manuals are tailored for specific engines and models.

Official Mercury Marine Website and Dealers

The most reliable source for obtaining a printed Mercury Marine service manual is the official Mercury Marine website. Here, you can find manuals specific to your engine model and serial number, ensuring accuracy. Additionally, authorized Mercury Marine dealers are excellent resources for purchasing these manuals. These dealers possess in-depth knowledge of Mercury products and can help you select the correct manual for your needs. Be wary of third-party sellers offering manuals, as their authenticity and accuracy can be questionable. Purchasing directly from Mercury Marine or an authorized dealer guarantees you receive a genuine, up-to-date service manual.

old culligan water softener manual

Finding an Old Culligan Water Softener Manual

Need help with your old Culligan softener? Finding the correct manual can be tricky, but it’s possible! Online resources and Culligan experts offer assistance in locating hard-to-find manuals.

Identifying Your Culligan Model

Before diving into the search for a manual, accurately identifying your Culligan water softener model is crucial. Look for a nameplate or sticker on the unit itself. Common locations include the back, side, or underneath the control valve assembly.

Note down any model numbers, series names (like Gold Series or Medallist Series), and serial numbers. These details are vital for narrowing your search. Some older models might only have a series name and a date code.

If the label is faded or missing, try to recall when you purchased the softener. This timeframe can help in identifying potential models released during that period. Consulting with a Culligan expert can also assist in identification if the physical markings are illegible.

Online Culligan Manual Resources

The internet is a valuable resource for locating older Culligan water softener manuals. Start by visiting the official Culligan website. Many manufacturers, including Culligan, maintain online libraries of product manuals, often in PDF format.

Use the model number or series name you identified earlier to search the Culligan website. If the official site doesn’t have the manual, try searching general online document repositories. Websites like ManualsLib or similar platforms often host a variety of user manuals, including those for older appliances.

Additionally, consider searching online forums dedicated to water softeners or home appliances. Other users may have encountered the same challenge and could share a digital copy or provide helpful links. Be sure to verify the manual’s accuracy and compatibility with your specific model.

Understanding Your Culligan Water Softener

Understanding your Culligan water softener involves knowing its basic operations and key components. This knowledge helps with maintenance and troubleshooting. Refer to your manual for model-specific details.

Basic Operation of a Culligan Softener

Culligan water softeners work by removing minerals like calcium and magnesium from your water supply. This process, called ion exchange, uses resin beads to attract and hold these minerals, preventing them from causing hardness issues in your home.

The softener cycles through regeneration to clean the resin beads. During regeneration, a brine solution flushes the collected minerals from the resin and prepares it for the next softening cycle. Older models may use a timer-based system for regeneration, while newer models use a metered system that regenerates based on water usage.

Understanding the regeneration cycle and salt levels are crucial for maintaining soft water. Regularly check your salt tank and adjust settings as needed. Refer to your specific Culligan manual for detailed operating procedures.

Key Components of Older Models

Older Culligan water softeners typically consist of several key components. The mineral tank houses the resin beads that perform the ion exchange process. A separate brine tank holds the salt solution used for regeneration.

The control valve regulates the flow of water through the softener and initiates the regeneration cycle. Older models often feature a mechanical timer to control the regeneration process, while newer models may have electronic controls.

Other important components include the injector, which draws the brine solution into the mineral tank, and the drain line, which carries away the wastewater during regeneration. Understanding these components is essential for troubleshooting and maintaining your older Culligan softener. Refer to your manual for diagrams and detailed descriptions.

Troubleshooting Common Issues

Having issues with your water softener? Common problems include regeneration failures and hard water symptoms. Use your manual to diagnose the problem and find potential solutions to get back to normal.

Regeneration Problems

Regeneration is a vital process for your Culligan water softener. If your system isn’t regenerating properly, you may notice issues such as hard water returning. Older Culligan models may have timers that need adjusting or replacing. Consult your manual for specific troubleshooting steps.

First, ensure the unit has sufficient salt. Next, check the timer and settings. Are they correct according to the manual? A malfunctioning timer is a frequent culprit in older units. If the timer seems fine, inspect the injector and drain line for clogs or damage. Clogged components can prevent proper regeneration.

If problems persist after checking these components, consider calling a Culligan expert. They can diagnose more complex issues and provide professional repairs. Remember to have your model number ready when seeking assistance.

Ignoring regeneration problems can lead to mineral buildup and decreased softener efficiency, so timely action is crucial.

Hard Water Symptoms

Recognizing hard water symptoms is crucial for identifying potential issues with your Culligan water softener. If you notice a change in your water quality, it might signal a problem. Common symptoms include⁚

Scale buildup⁚ Look for white, chalky deposits on faucets, showerheads, and in your appliances. This scale is a clear indication of hard water minerals.

Reduced lathering⁚ Hard water interferes with soap’s ability to lather effectively. You might find yourself using more soap than usual.

Dry skin and hair⁚ Hard water can leave your skin feeling dry and itchy, and your hair may appear dull and lifeless.

Spotty dishes⁚ If your dishes have spots or a film after washing, it’s likely due to hard water minerals.

Changes in taste⁚ Hard water can alter the taste of your water, making it unpleasant to drink.

If you observe these symptoms, consult your Culligan manual for troubleshooting steps.

Maintenance and Repair

Keep your Culligan water softener running smoothly. Regular maintenance and timely repairs are essential. Consult your manual for specific instructions on salt tank upkeep and timer adjustments.

Salt Tank Maintenance

Maintaining your Culligan water softener’s salt tank is crucial for its efficient operation. Regularly check the salt levels and ensure the tank is adequately filled. Most systems use rock salt, but check your manual to confirm the correct type. The salt should be several inches above the water level, but never filled to the very top. A properly maintained salt tank ensures efficient regeneration and consistent soft water.

Periodically inspect the salt tank for salt bridges or crusting, which can prevent the salt from dissolving properly. If you find a salt bridge, carefully break it up with a broom handle or similar tool. Avoid using sharp objects that could damage the tank. It’s also important to clean the salt tank periodically to remove sediment and debris that can accumulate over time. This will help maintain the overall performance of your Culligan water softener and extend its lifespan. Always refer to your specific model’s manual for detailed cleaning instructions and safety precautions.

Timer and Settings Adjustments

Adjusting the timer and settings on your Culligan water softener is essential for optimal performance. Consult your owner’s manual for specific instructions, as procedures vary by model. Older Culligan softeners may have mechanical timers, while newer ones have electronic controls. Resetting the timer may be necessary after a power outage.

The salt dosage setting determines how much salt is used during regeneration. Adjusting this based on your water hardness can save salt and improve efficiency. The regeneration frequency setting dictates how often the softener cleans itself. This should be adjusted according to your water usage and hardness. If your water isn’t soft enough, increase the frequency. Always refer to the manual for recommended settings. Incorrect settings can lead to inefficient operation, hard water, or excessive salt consumption, so accuracy is vital.

Culligan Softener Manuals⁚ Key Sections

Culligan manuals contain vital sections. Look for installation, operation, and warranty details. These sections guide setup, usage, and coverage. Understanding them ensures proper function and protects your investment.

Installation Instructions

The installation instructions are critical for setting up your Culligan water softener correctly. These instructions provide a step-by-step guide, ensuring proper connections and avoiding potential issues. They often include diagrams and detailed explanations for each stage of the installation process.

Pay close attention to warnings and safety precautions outlined in the manual. Incorrect installation can lead to leaks, reduced efficiency, or even damage to the unit or your plumbing system. Specific instructions will detail how to connect the softener to your main water line, drain, and power supply.

Older manuals may require extra care due to outdated plumbing standards. If unsure, consult a professional installer. The manual may also include information on setting up the bypass valve, which allows you to isolate the softener for maintenance or repairs. Following the instructions precisely will guarantee optimal performance.

Operating Procedures

Understanding the operating procedures is crucial for maximizing the effectiveness of your Culligan water softener. The manual will detail how to initiate and monitor the regeneration cycle, which is essential for maintaining the softener’s ability to remove hardness minerals. It explains how to set the timer and adjust salt settings.

Older Culligan models often have specific requirements for salt type and levels. The operating instructions will guide you on how to properly fill and maintain the salt tank. They also cover how to interpret error codes or unusual system behavior;

The manual details the importance of understanding the water hardness level in your area. Regular testing is recommended to ensure that the softener is set up correctly. Understanding the operating procedures will help you avoid common problems and maintain the softener in good working condition.

Warranty Information

The warranty information section of your Culligan softener manual is vital for understanding the coverage and limitations of your system. Older models may have different warranty terms than newer ones, so it’s essential to review the specific details outlined in your manual.

It specifies the duration of the warranty, what components are covered, and what conditions might void the warranty. Common exclusions may include damage from improper installation, neglect, or unauthorized repairs. The manual will also outline the procedure for filing a warranty claim.

Understanding the warranty helps you protect your investment and ensure that you receive the necessary support from Culligan if issues arise. Keep your manual in a safe place for future reference.

ubotie keyboard manual

Ubotie Keyboard Manual⁚ A Comprehensive Guide

Welcome to the Ubotie keyboard manual! This guide simplifies using your Ubotie keyboard, whether it’s retro, wireless, or a colorful model. We provide accessible instructions for setup, troubleshooting, and device compatibility.

Ubotie keyboards have gained popularity for their unique blend of retro aesthetics and modern functionality. Inspired by classic typewriter designs, these keyboards offer a tactile and visually appealing typing experience. Many users are drawn to their colorful designs, with options like the rainbow keyboard, adding a touch of personality to their workspace.

Ubotie keyboards also boast wireless connectivity, often utilizing both 2.4GHz and Bluetooth technology. This allows for seamless switching between devices, such as laptops, smartphones, and tablets. The wireless feature enhances portability and reduces cable clutter, making them ideal for both home and office use. Whether you’re a writer, student, or simply someone who appreciates a stylish and functional keyboard, Ubotie offers a range of models to suit diverse needs and preferences. The ease of connecting to various operating systems, including Windows, Android, iOS, and Mac OS, adds to their versatility and user-friendliness.

Ubotie Keyboard Features and Models

Explore Ubotie keyboards’ features and models, blending retro style with modern wireless connectivity. Discover their unique designs and versatile functionality for various devices and operating systems.

Retro Typewriter Style

The Ubotie keyboard distinguishes itself with a retro typewriter-style design. This aesthetic choice isn’t purely for looks; users report that the unique key design makes typing a breeze. This design evokes nostalgia while offering the functionality of a modern keyboard. The tactile feedback and distinct sound of each keystroke contribute to an engaging and satisfying typing experience.

Many users appreciate this design, with some describing it as a trendy accessory. The Ubotie’s retro style isn’t just about appearance; it enhances usability. The rounded keys and ample spacing reduce typos and improve typing accuracy. This design caters to those seeking a blend of vintage aesthetics and modern performance.

Whether you are a writer, student, or professional, the Ubotie’s retro typewriter style offers a unique and enjoyable typing experience. The combination of visual appeal and enhanced functionality makes it a standout choice in the keyboard market.

Wireless Connectivity (2.4GHz and Bluetooth)

Ubotie keyboards offer versatile wireless connectivity options, supporting both 2.4GHz and Bluetooth. The 2.4GHz connection ensures a dropout-free experience, ideal for uninterrupted work. For those seeking flexibility, Bluetooth connectivity allows seamless switching between devices, such as laptops and smartphones.

Users appreciate the convenience of connecting to multiple devices without needing multiple keyboards. The Bluetooth pairing process is simple, enhancing user experience. Ubotie keyboards can quickly switch between operating systems by pressing FN and Q, W, or E for Android, Windows, and iOS/Mac OS, respectively.

These features make Ubotie keyboards a practical choice for multitasking. The wireless capabilities eliminate cable clutter, providing a cleaner workspace. Whether you prefer the stability of 2.4GHz or the convenience of Bluetooth, Ubotie keyboards adapt to your connectivity needs, ensuring efficient and flexible usage.

Connecting Your Ubotie Keyboard

Connecting your Ubotie keyboard is simple! Choose between Bluetooth for wireless freedom or use the USB receiver for a stable connection. Follow our easy instructions for pairing.

Bluetooth Pairing Instructions

To connect your Ubotie keyboard via Bluetooth, first ensure the keyboard is powered on. Locate the power switch, often found on the back or right side, and flip it to the “On” position. A flashing LED light indicates it’s ready to pair;

Next, activate Bluetooth pairing mode on your Ubotie keyboard. Refer to your device’s user manual for specific instructions, as the exact steps may vary. Generally, this involves pressing a specific function key combination (e.g., FN + Bluetooth key).

On your computer or device, enable Bluetooth and search for available devices. Select your Ubotie keyboard from the list. Once selected, follow any on-screen prompts to complete the pairing process. A successful pairing will allow you to test functionality.

If prompted for a passcode, enter “0000” or any code displayed on your screen. After pairing, you can switch operating systems by clicking FN+Q/W/E (Android, Windows, iOS, respectively).

Connecting via USB Receiver

Connecting your Ubotie keyboard using the USB receiver is a straightforward process, ideal for a stable, dropout-free 2.4GHz wireless connection. First, locate the USB receiver that came with your Ubotie keyboard and mouse combo.

Next, insert the USB receiver into an available USB port on your computer. The keyboard should automatically begin the connection process with your computer via the receiver. Ensure the keyboard is powered on using the power switch located on the keyboard itself.

If the keyboard does not connect automatically, try plugging the receiver into a different USB port. Also, ensure that there are no other wireless devices interfering with the signal. Refer to your product manual if issues persist.

For Ubotie keyboard and mouse combos, both devices will connect through this single receiver. No additional steps are needed, and you can begin using your keyboard immediately.

Troubleshooting Common Issues

Encountering problems with your Ubotie keyboard? This section addresses common issues, like keys not typing or outdated drivers. Find solutions here for a smoother typing experience.

Keyboard Not Typing Letters

Is your Ubotie keyboard refusing to type letters? This frustrating issue often stems from a few common causes. First, ensure the keyboard is switched on; the power switch is typically located on the back or right side. A flashing LED light indicates it’s powered on and ready to connect.

If the keyboard is on but still not typing, check the connection. For wireless models, verify that the USB receiver is properly inserted into your computer, or that the Bluetooth connection is active and paired correctly. Try re-pairing the devices if necessary, referring to your device’s Bluetooth settings.

Outdated drivers can also be the culprit. Since manual updates are needed, ensure your keyboard drivers are up to date to avoid keyboard malfunctions. If problems persist, refer to the online manual for more specific troubleshooting steps.

Outdated Drivers

Outdated drivers are a common cause of keyboard malfunctions, including the frustrating issue of your Ubotie keyboard not typing letters. Drivers are essential software that allows your computer to communicate effectively with the keyboard. When these drivers become outdated, compatibility issues can arise, leading to impaired functionality.

The process of updating drivers is often manual, meaning they’re not regularly updated, potentially leading to problems over time. To ensure optimal performance, it’s crucial to keep your Ubotie keyboard drivers up to date.

Check the manufacturer’s website or reliable driver update resources for the latest versions. Keeping your drivers current can resolve many keyboard-related issues and ensure seamless operation. Consider setting reminders for periodic driver checks to maintain your keyboard’s performance.

Ubotie Keyboard and Device Compatibility

Ubotie keyboards offer broad device compatibility. Easily switch between operating systems like Windows, Android, iOS, and Mac OS. Enjoy seamless connectivity across your devices with Ubotie.

Switching Between Operating Systems (Windows, Android, iOS, Mac OS)

The Ubotie keyboard is designed for seamless switching between different operating systems. To switch between systems, use the FN key in combination with another key. For Android, press FN + Q. For Windows, press FN + W. If you are using an iOS device, press FN + E. And finally, FN + E will prompt the keyboard that you are on a Mac OS device;

These simple shortcuts enable you to quickly adapt your keyboard to the operating system of the device you are currently using. Remember to refer to your device’s user manual for Bluetooth pairing. Once connected, test the functionality of your Ubotie keyboard on your device.

This feature is excellent for individuals who frequently switch between devices, such as using a smartphone, tablet, and laptop. Enjoy the flexibility and convenience of the Ubotie keyboard across all your devices.

Finding and Accessing the User Manual

Find Ubotie keyboard user manuals online for easy troubleshooting and setup. Access instruction manuals and user guides instantly for quick assistance with your keyboard.

Online Manuals and User Guides

Accessing your Ubotie keyboard’s user manual online offers a convenient way to troubleshoot issues and understand its features. ManualsPlus is a helpful resource, providing free online manuals and user guides for a vast range of products. If you’re experiencing problems like your keyboard not typing letters, the manual can offer specific solutions.

For initial setup or detailed instructions, refer to the product manual included with your Ubotie keyboard. If you’ve misplaced it, online resources can provide the information you need. These online manuals often include detailed diagrams and troubleshooting steps to resolve common issues. They cover topics like Bluetooth pairing, switching between operating systems (Windows, Android, iOS, Mac OS), and using function keys.

Exploring online manuals can simplify your experience and ensure you get the most out of your Ubotie keyboard.

fm3 manual

FM3 Manual⁚ A Comprehensive Guide

Welcome to the world of the FM3! This comprehensive guide offers a roadmap to understanding and utilizing your FM3’s vast capabilities. From basic setup to advanced techniques, explore every facet of your device.

The Fractal Audio FM3 is a powerful floor-based multi-effects processor, designed for both guitar and bass. This device is a compact powerhouse, offering a vast array of amp models and effects. Whether you’re a seasoned professional or just starting your musical journey, the FM3 provides a versatile platform for tone exploration.

Serving as a standalone fly-rig or seamlessly integrating into an existing setup, the FM3 adapts to any playing style. This manual covers firmware 7.x, supporting both the FM3 Standard and FM3 Mark II Turbo versions. Dive in and unlock the potential of your FM3!

Understanding the FM3’s Features

Delve into the core of the FM3! This section uncovers the key features that make this processor a game-changer. Explore amp modeling, effects processing, and more to master your sound.

Overview of FM3 Standard and FM3 Mark II Turbo

The FM3 family includes the original FM3 Standard and the enhanced FM3 Mark II Turbo. The updated FM3 Mark II Turbo features improvements informed by user feedback and support experiences. Key enhancements focus on optimized performance. These include but are not limited to, larger, more readable footswitch displays. Both models offer powerful amp modeling and effects capabilities. The FM3 Mark II Turbo delivers an even more refined user experience. Owners manuals are updated to include specific information for both versions. This ensures users have the most relevant guidance for their specific device.

Exploring Amp Modeling and Effects Processing Capabilities

The FM3 shines with its extensive amp modeling and effects processing. Dive into a vast library of amp models, recreating classic and modern tones. Experiment with a wide array of effects, from overdrives and distortions to reverbs and delays. Craft unique soundscapes by combining different amps and effects. The FM3 allows for deep customization of each amp and effect parameter. Tailor your sound with precision. Explore the provided presets, or create your own from scratch. With its processing power, the FM3 delivers studio-quality sound on stage or in the studio.

Navigating the FM3 Owners Manual

Master the FM3 by understanding its manual. This section guides you through accessing the latest versions, understanding key sections, and staying updated with firmware 7.x manuals. Explore updates efficiently.

Accessing and Downloading the Latest Manual Versions

To make the most of your FM3, it’s essential to have the latest version of the owner’s manual. Fractal Audio provides these manuals in digital format, readily accessible for download. Usually, you can find it on the Fractal Audio official website in the ‘Downloads’ section. Navigate to the FM3 product page and locate the “Manuals” category. The manual is typically available as a PDF file, allowing easy viewing on computers, tablets, and smartphones. Always check for the most recent revision to ensure you have the most up-to-date information regarding features, updates, and safety guidelines.

Key Sections and Updates in Firmware 7.x Manuals

The Firmware 7.x manuals for the FM3 include crucial updates and information for users seeking to maximize their device’s potential. Key sections cover amp modeling, effects processing, connectivity, and advanced configuration. Updates often address new features, bug fixes, and improvements to existing functionalities. Pay close attention to sections detailing new amp models, updated effects algorithms, and changes to the user interface. Furthermore, the manual provides guidance on connecting external devices, MIDI implementation, and troubleshooting common issues. Carefully reviewing these sections will ensure you are fully informed about the latest enhancements and can leverage the full power of your FM3 with Firmware 7.x.

Connecting and Configuring the FM3

Connecting the FM3 unlocks a world of possibilities. Proper configuration is essential for optimal performance. Explore various connection options and configuration settings to tailor the FM3 to your specific needs.

Using the FC-6 and FC-12 Controllers with the FM3

The FC-6 and FC-12 controllers significantly expand the FM3’s functionality, offering enhanced foot control for live performance and studio use. Connecting via a single XLR/FASLINK cable provides two-way communication and powers the FC-6 without an AC adapter. The Mark II versions of these controllers feature larger footswitch displays, improving readability on stage. These controllers offer flexible and intuitive control over presets, scenes, effects, and other parameters. The FC-6 and FC-12 seamlessly integrate with the FM3, providing a powerful and streamlined workflow for guitarists and bassists seeking ultimate control over their sound.

Connecting Expression Pedals and Other Peripherals

Expanding the FM3’s capabilities involves connecting expression pedals and other peripherals. Use TRS cables to connect expression pedals to the dedicated pedal jacks. These pedals offer real-time control over parameters like volume, wah, and other effects. The FM3 also supports MIDI devices for advanced control and integration with external gear. By connecting additional footswitches, you can further customize your control layout. Experiment with different peripherals to tailor your FM3 setup to your specific needs and playing style. Properly connecting these devices unlocks the FM3’s full potential, offering unparalleled flexibility and expression.

Utilizing OMG9 and OMG15 Layouts

OMG9 and OMG15 layouts are custom configurations for the FM3, designed to optimize workflow with Fractal Audio FC-6 controllers. These layouts provide intuitive control and expanded functionality for live performances.

Installing and Configuring Custom Layouts

Installing custom layouts like OMG9 or OMG15 on your FM3 is streamlined through the “SETUP⁚ FC Controllers⁚ Reset” function within the FM3’s firmware, starting with version 4.0. This process allows for automatic installation, simplifying setup. You can download OMG9 and OMG15 layout files, which often come with accompanying documentation to guide you through specific configurations. Once installed, understanding the layout’s button assignments and functionalities is key to maximizing its potential. Custom layouts offer tailored control schemes, enhancing your ability to navigate presets and effects during live performances or studio sessions, leading to a more personalized user experience.

Understanding the Benefits of OMG Layouts with FC-6

OMG9 layouts, designed for the FM3 with a single FC-6 controller, enhance workflow by optimizing footswitch assignments. These layouts facilitate quick access to scenes, effects, and other parameters, improving on-the-fly adjustments. A single XLR/FASLINK cable connects the FC-6, handling two-way communication and power. With OMG9, users can leverage the FC-6’s six switches for greater control over their sound. For instance, accessing tuner mode by holding the left switch of the FM3, or toggling scenes via the center switch becomes intuitive. This integration provides a streamlined user experience, freeing up hands and allowing for more expressive performances.

Troubleshooting Common Issues

Encountering difficulties? This section addresses typical problems faced by FM3 users. Find solutions for connectivity issues, unexpected behavior, and more. Consult the FM3 Owners Manual for detailed guidance.

Addressing Problems with MIDI Communication

MIDI communication issues can be frustrating. Ensure proper connections between the FM3 and external devices like controllers or computers. Verify MIDI channels, cabling and settings in the FM3’s I/O menu are correctly configured. Check for firmware compatibility issues, updating if necessary. Reference the FC Owners Manual or FM9/FM3 Owners Manuals for detailed MIDI implementation guides. Furthermore, ensure there are no conflicting MIDI assignments. Incorrect or duplicate assignments can cause erratic behavior. Experiment with different MIDI modes and messages to isolate the problem. If problems persist, consult the Fractal Audio forum or support for advanced troubleshooting steps.

Finding Solutions in the FM3 Owners Manual

The FM3 Owners Manual is your first port of call for troubleshooting. It covers a wide array of topics, from basic operation to advanced configurations. Utilize the manual’s search function or table of contents to quickly locate relevant sections. Look for chapters dedicated to specific issues like connectivity, audio routing, or effects parameters. The manual often includes step-by-step instructions and diagrams to guide you through the troubleshooting process. Pay attention to notes and warnings, as they often highlight common pitfalls. The manual is updated with each firmware release, so ensure you are using the latest version for accurate information.

Firmware Updates and Software

Keep your FM3 up-to-date with the latest firmware for optimal performance. Explore Fractal-Bot for easy updates and backups. Access essential software and drivers to unlock the full potential of your device.

Downloading and Installing Latest Firmware

Ensuring your FM3 operates with the newest firmware is crucial for accessing enhanced features and bug fixes. Begin by visiting the Fractal Audio website to locate the latest firmware version available for your FM3 model, including the FM3 Mark II Turbo. Download the appropriate file to your computer, ensuring it’s compatible with your device. Utilize Fractal-Bot, a dedicated software tool, to streamline the installation process. Connect your FM3 to your computer via USB, launch Fractal-Bot, and follow the on-screen prompts to seamlessly update your firmware. This process guarantees optimal performance.

Using Fractal-Bot for Updates and Backups

Fractal-Bot serves as a vital tool for maintaining your FM3. It simplifies both firmware updates and data backups. To update, connect your FM3 to your computer via USB and launch Fractal-Bot. The software guides you through selecting the downloaded firmware file and initiating the installation. Regular backups are equally important. Fractal-Bot allows you to create complete system backups, safeguarding your presets, settings, and configurations. In case of unforeseen issues or accidental data loss, restoring from a backup ensures a swift return to your preferred setup. Employ Fractal-Bot for peace of mind and efficient management.

ryobi 3716 manual

Ryobi RY3716 Manual⁚ A Comprehensive Guide

Welcome to a comprehensive guide dedicated to the Ryobi RY3716 chainsaw. This resource provides users with valuable information, covering everything from key features and safety instructions to maintenance, repair resources, and part locations.

The Ryobi RY3716 chainsaw is designed for homeowners and professionals alike, offering a blend of power and affordability. With a 37cc 2-cycle engine, it provides ample power for various cutting tasks around the yard. Its lightweight design ensures ease of use, while features like the anti-vibration handle enhance comfort during extended operation. The automatic oiler prolongs the life of the bar and chain, and the tool-free air filter cover simplifies maintenance; Safety features, including the inertia-activated chain brake and Safe-T-Tip, prioritize user protection. This guide provides comprehensive information to help you use and maintain your Ryobi RY3716 effectively.

Key Features and Specifications

The Ryobi RY3716 chainsaw is equipped with a 37cc 2-cycle engine, delivering reliable power for various cutting tasks. It features a 16-inch bar length, suitable for felling small trees and limbing branches. The anti-vibration handle enhances user comfort during extended use, while the automatic oiler ensures continuous lubrication of the bar and chain. A tool-free air filter cover simplifies maintenance, and the side-access chain tensioner allows for quick adjustments. Safety features include an inertia-activated chain brake and a Safe-T-Tip. This chainsaw combines power, convenience, and safety, making it an ideal choice for homeowners and professionals.

Engine Power and Bar Length

The Ryobi RY3716 chainsaw is powered by a robust 37cc 2-cycle engine, designed to provide ample power for various cutting applications. This engine ensures efficient performance when tackling tasks such as cutting firewood, pruning trees, and clearing brush. Complementing the engine is a 16-inch bar, which offers a balance between maneuverability and cutting capacity. This bar length is well-suited for both smaller limbs and larger diameter logs, making the RY3716 a versatile tool for homeowners and professionals alike. The combination of engine power and bar length ensures optimal cutting efficiency.

Anti-Vibration Handle and Automatic Oiler

The Ryobi RY3716 chainsaw is equipped with an anti-vibration handle, significantly reducing user fatigue during prolonged use. This feature enhances comfort and control, allowing for more precise and safer operation. Additionally, the chainsaw features an adjustable automatic oiler, which continuously lubricates the bar and chain during operation. This automatic oiler minimizes friction, extends the life of the bar and chain, and ensures smooth cutting performance. The combination of the anti-vibration handle and automatic oiler makes the Ryobi RY3716 a user-friendly and efficient tool for a variety of cutting tasks, promoting both comfort and longevity.

Safety Features⁚ Chain Brake and Safe-T-Tip

The Ryobi RY3716 chainsaw prioritizes user safety with essential features like a chain brake and Safe-T-Tip. The inertia-activated chain brake immediately stops the chain’s movement in the event of kickback, reducing the risk of injury. This crucial feature provides an extra layer of protection during operation. Complementing the chain brake, the Safe-T-Tip is designed to prevent rotational kickback, further enhancing user safety. These safety mechanisms demonstrate Ryobi’s commitment to providing tools that minimize risks and ensure a safer working environment for homeowners and professionals alike when utilizing the RY3716 chainsaw.

Finding and Downloading the Ryobi RY3716 Manual

Locating the Ryobi RY3716 chainsaw manual is a straightforward process. Start by visiting the official Ryobi website, where you can access a comprehensive library of manuals for their products. Navigate to the “Support” section and look for the “Manuals” page. Here, you can search for the RY3716 manual by entering the model number in the search bar. Alternatively, browse through the product categories to find the chainsaw section and locate the RY3716. Once found, you can download the manual in PDF format for easy access;

Manual Contents⁚ Operation and Safety Instructions

The Ryobi RY3716 manual is a crucial resource for safe and effective chainsaw operation. It comprehensively covers essential information, including step-by-step instructions for starting and stopping the chainsaw, ensuring user familiarity with its operation. Safety is paramount, and the manual details critical precautions to prevent accidents, such as wearing appropriate safety gear and maintaining a safe working distance. Furthermore, it guides users on proper handling techniques and chain brake operation. Understanding these safety guidelines is essential for responsible chainsaw operation and injury prevention, making the manual an indispensable tool.

Starting and Stopping the Chainsaw

The Ryobi RY3716 manual offers precise guidance on safely starting and stopping the chainsaw. It details the correct procedures, including priming the engine and engaging the choke for a smooth start. Safety interlocks and proper grip techniques are emphasized to prevent accidental starts. The manual also explains various stopping methods, such as using the on/off switch and engaging the chain brake for immediate halts in emergencies. Mastering these starting and stopping procedures is crucial for user safety and extending the chainsaw’s lifespan. Consulting the manual ensures correct operation and reduces the risk of accidents.

Adjusting Chain Tension and Maintenance

Maintaining optimal chain tension is crucial for the Ryobi RY3716 chainsaw’s performance and safety, as detailed in the operator’s manual. The manual provides step-by-step instructions on how to adjust chain tension using the side-access tensioner. Regular chain maintenance, including sharpening the cutters at the correct angles, is also covered. Proper filing angles for both the top and side plates are explained to ensure efficient cutting. The manual emphasizes the importance of inspecting the chain for damage and lubricating it regularly. Neglecting chain tension and maintenance can lead to reduced cutting efficiency and potential safety hazards.

Carburetor Adjustment and Troubleshooting

The Ryobi RY3716 manual offers detailed guidance on carburetor adjustment to ensure optimal engine performance. It includes instructions for adjusting the idle speed screw, as improper settings can affect chainsaw operation. Troubleshooting tips are provided to address common issues such as difficulty starting or poor engine performance. The manual advises users to consult the carburetor adjustment section if the chainsaw is not running smoothly. It warns about the dangers of improper adjustments and recommends seeking professional assistance if needed. Understanding the carburetor settings is crucial for maintaining the chainsaw’s efficiency and prolonging its lifespan, as noted in the guide.

Maintenance and Repair Resources

The Ryobi RY3716 manual contains valuable resources for maintaining and repairing your chainsaw. It guides users to replacement part stores, which are essential for sourcing original components. Authorized service centers are available for professional assistance, offering expertise in diagnosing and fixing issues. For quick repairs, Ryobi provides a Rapid Repair program, ensuring a fast turnaround. Registering your product unlocks additional support and warranty benefits. The manual also highlights the availability of online resources, including user guides and FAQs. By utilizing these maintenance and repair resources, owners can extend the life of their Ryobi RY3716 chainsaw.

Replacement Parts and Service Centers

When your Ryobi RY3716 chainsaw requires maintenance or repair, locating the correct replacement parts is crucial. The official Ryobi parts store is your primary source for genuine components, ensuring compatibility and optimal performance. In addition to replacement parts, Ryobi provides access to authorized service centers staffed by trained technicians. These service centers offer expert diagnostic and repair services, ensuring your chainsaw is running smoothly. Refer to the Ryobi website or manual for a directory of authorized service centers near you. Using genuine replacement parts and professional service centers helps maintain the longevity and efficiency of your Ryobi RY3716.

Rapid Repair Program

For convenient and expedited service, Ryobi offers the Rapid Repair program, designed to minimize downtime for your RY3716 chainsaw. This program provides a streamlined repair process with a quick turnaround time, typically around 14 days. To utilize the Rapid Repair program, you can visit the Ryobi website or contact customer support for instructions on how to send in your chainsaw. Once received, Ryobi technicians will diagnose and repair your tool, ensuring it’s returned to you in optimal working condition. This program is a valuable resource for getting your Ryobi RY3716 back in action promptly.

Registering Your Ryobi Product

Registering your Ryobi RY3716 chainsaw is a crucial step to unlock various benefits and ensure you receive the best possible support. By registering, you can activate your warranty, providing coverage for potential defects or malfunctions. Registration also allows Ryobi to keep you informed about product updates, safety recalls, and exclusive offers. You can easily register your product online through the Ryobi website, where you’ll need to provide some basic information such as your name, address, purchase date, and the model number of your chainsaw. Registering your Ryobi RY3716 is a simple process.

Where to Buy Ryobi Tools and Manuals

Finding Ryobi tools and manuals, including the RY3716 chainsaw manual, is straightforward with several options available. Major retailers like Home Depot and Lowe’s often carry a wide selection of Ryobi products, both in-store and online. You can also explore online marketplaces such as Amazon and eBay for new and used Ryobi tools and manuals. For official Ryobi manuals and parts, the Ryobi website is the best resource. Local authorized service centers are another place to check, as they may have manuals or be able to order them for you.

hobart champion elite 225 manual

Hobart Champion Elite 225 Manual⁚ A Comprehensive Guide

This comprehensive guide offers a detailed overview of the Hobart Champion Elite 225 engine-driven welder/generator. It is designed to help users understand the features, operation, safety precautions, and maintenance of this versatile machine. This manual is an essential resource for maximizing its potential.

The Hobart Champion Elite 225 is a versatile engine-driven welder and generator, designed for a variety of applications, including farm use, general construction, and emergency power. This all-in-one machine combines a 225-amp DC welder with an 11,000-watt AC generator, offering both welding and power generation capabilities in a single unit.

This powerful combination makes the Champion Elite 225 ideal for situations where both welding and electrical power are needed but access to utility power is limited or unavailable. Its robust design and reliable performance make it a valuable asset for professionals and hobbyists alike.

The Champion Elite 225’s capabilities extend to stick (SMAW) welding processes, allowing for welding a range of materials. Moreover, its generator output is suitable for powering various tools and equipment, enhancing its utility in remote locations or during power outages. Understanding its features and operation is key to safe and efficient use.

This guide provides a comprehensive overview of the Champion Elite 225, including its key features, safety precautions, operating instructions, troubleshooting tips, and maintenance procedures. By following the guidelines in this manual, users can maximize the performance and lifespan of their Champion Elite 225.

Key Features and Specifications

The Hobart Champion Elite 225 combines a DC welder and AC generator. It features stick welding capabilities and a substantial generator output. Understanding these specifications ensures optimal usage for diverse applications, from welding to powering equipment on the field.

Welding Capabilities (SMAW/Stick)

The Hobart Champion Elite 225 excels in Shielded Metal Arc Welding (SMAW), commonly known as stick welding. This process is highly versatile and suitable for various applications, including farm repairs, general construction, and maintenance work. With its robust welding capabilities, the Champion Elite 225 allows users to tackle a wide range of welding projects with ease.

The machine provides a reliable and stable arc, ensuring quality welds even in challenging conditions. The amperage output is designed to accommodate different electrode sizes and material thicknesses, offering flexibility for diverse welding needs. The Champion Elite 225’s stick welding function is engineered for both experienced welders and those new to the process, making it an accessible and practical choice.

Furthermore, the machine’s design includes features that enhance the welding experience, such as adjustable arc force control, which helps prevent electrodes from sticking during welding. This feature contributes to smoother and more consistent welds. The Hobart Champion Elite 225 is a dependable solution for stick welding tasks, delivering performance and durability in a single package.

Generator Output (Watts)

The Hobart Champion Elite 225 boasts a substantial generator output, providing 11,000 watts of AC power. This capability makes it a valuable asset for various applications beyond welding, including providing emergency power during outages, running power tools at remote job sites, and operating appliances when grid electricity is unavailable. The high wattage output ensures that multiple devices can be powered simultaneously.

The generator function is designed for reliability and efficiency, delivering consistent power to connected equipment. Its robust construction and dependable engine ensure long-lasting performance, making it suitable for demanding work environments. The Champion Elite 225’s generator output allows users to accomplish tasks that would otherwise be impossible without access to a traditional power source.

Moreover, the machine includes multiple outlets for convenient power distribution, accommodating a variety of plug types and power requirements. The generator is also equipped with safety features to protect connected devices from voltage fluctuations and overloads, ensuring the safe and reliable operation of sensitive electronic equipment. The Hobart Champion Elite 225 is both a powerful welder and a capable generator.

Safety Precautions and Guidelines

Prioritizing safety is paramount when operating the Hobart Champion Elite 225. This section outlines essential safety precautions and guidelines to prevent accidents and ensure a safe working environment. Always read and understand the complete owner’s manual before operating the machine. Never attempt to operate the equipment if you are not properly trained or familiar with its functions.

Before starting any welding or generator operation, inspect the equipment for damage or wear. Ensure all safety guards and covers are in place and functioning correctly. Wear appropriate personal protective equipment (PPE), including a welding helmet with the correct shade, safety glasses, gloves, and protective clothing. Always work in a well-ventilated area to avoid inhaling harmful fumes and gases produced during welding.

When using the generator function, be mindful of electrical hazards. Ensure the equipment being powered is properly grounded and that all cords are in good condition. Never operate the generator in wet or damp conditions. Keep flammable materials away from the engine and exhaust. Following these guidelines will help ensure a safe and productive work experience with the Hobart Champion Elite 225.

Operating Instructions

This section provides step-by-step operating instructions for the Hobart Champion Elite 225, covering both welding and generator functions. Before starting, ensure you have read and understood all safety precautions. Proper operation ensures optimal performance and longevity of the equipment. Familiarize yourself with the control panel layout and the function of each switch and dial.

To start the engine, follow the manufacturer’s recommended procedure. Allow the engine to warm up before initiating welding or generator operations. For welding, select the appropriate welding process (SMAW/Stick) and adjust the amperage according to the material thickness and electrode type. Maintain a proper arc length and travel speed for optimal weld quality. Consult the welding chart in the manual for recommended settings.

For generator operation, ensure the output voltage selector is set to the correct voltage for the equipment being powered. Connect the equipment to the appropriate receptacles. Monitor the generator’s output to avoid overloading. Shut down the engine properly after use, following the manufacturer’s instructions. Regular practice and adherence to these instructions will ensure efficient and safe operation.

Troubleshooting Common Issues

This section addresses common problems encountered while using the Hobart Champion Elite 225. It provides potential causes and solutions for operational issues. Always refer to the safety guidelines before attempting any troubleshooting procedures to prevent injury.

Welding Troubleshooting

When experiencing welding difficulties with your Hobart Champion Elite 225, several factors could be contributing to the issue. Begin by checking your electrode selection, ensuring it matches the material being welded and that it’s appropriate for the selected amperage range. Incorrect electrode choice can lead to poor arc stability and weld quality.

Next, inspect your work clamp connection. A loose or corroded connection will significantly reduce the welding current, resulting in a weak or nonexistent arc. Clean the clamp and workpiece to ensure a solid electrical contact. Also, verify that your amperage and voltage settings are correctly configured for the material thickness and electrode type.

Arc blow, a phenomenon where the arc deflects erratically, can also cause welding problems. This is often due to magnetism in the workpiece. Try grounding the workpiece in a different location or wrapping the welding cable around the workpiece to reduce magnetic interference. If these steps do not resolve the issue, consult a qualified technician.

Furthermore, examine the electrode holder for damage or loose connections. A faulty holder can interrupt the current flow, leading to an unstable arc. Finally, consider environmental factors such as wind, which can disrupt the shielding gas and affect weld quality.

Maintenance and Servicing

Regular maintenance is crucial to ensure the Hobart Champion Elite 225 operates at peak performance and enjoys a long service life. Before performing any maintenance, always disconnect the spark plug wire to prevent accidental starting. Begin by regularly inspecting the engine’s air filter. A dirty air filter restricts airflow, reducing engine power and increasing fuel consumption.

Clean or replace the air filter as needed, following the manufacturer’s recommendations. Next, check the engine oil level before each use and change the oil according to the recommended schedule. Using the correct type and grade of oil is essential for engine lubrication and cooling. Inspect the spark plug periodically for fouling or damage. Clean or replace the spark plug as necessary to ensure proper ignition.

The welding components also require regular attention. Clean the welding terminals and check for loose connections. Inspect the welding cables for damage or wear and replace them if necessary. Periodically clean the generator windings to remove dust and debris, which can cause overheating. Store the Champion Elite 225 in a dry and protected environment when not in use to prevent corrosion and damage from the elements.

Finally, adhere to the maintenance schedule outlined in the owner’s manual for optimal performance.

Parts List and Diagrams

Understanding the component layout of your Hobart Champion Elite 225 is essential for effective maintenance and repair. The parts list and diagrams section provides a detailed breakdown of all the machine’s components, from the engine and generator to the welding circuitry and control panel. Each part is identified with a unique part number, facilitating accurate ordering of replacement parts.

The diagrams offer exploded views of various assemblies, illustrating how individual components fit together. This visual aid is invaluable when disassembling and reassembling the machine for maintenance or repairs. The parts list typically includes descriptions of each part, such as size, material, and specifications. This information is crucial when sourcing replacement parts from suppliers.

Using the parts list and diagrams ensures you order the correct components, preventing delays and ensuring compatibility. When ordering parts, always refer to the specific model and serial number of your Champion Elite 225 to ensure you receive the appropriate parts. Common parts include air filters, oil filters, spark plugs, welding electrodes, and generator brushes. The parts list and diagrams are indispensable tools for anyone performing maintenance or repairs on the Hobart Champion Elite 225, ensuring the longevity and optimal performance of your equipment.

Where to Find the Manual

Accessing the Hobart Champion Elite 225 manual is crucial for safe and efficient operation. The manual contains vital information regarding setup, operation, maintenance, and troubleshooting. Fortunately, several avenues exist for obtaining this essential document. The primary source is often the Hobart Welders website, where you can typically download a PDF version of the manual free of charge. Simply navigate to the “Support” or “Resources” section and search for your specific model.

Alternatively, if you purchased the Champion Elite 225 new, the manual should have been included in the packaging. Check any compartments or documentation folders that came with the unit. Many online retailers, such as Amazon or welding supply stores, may also offer the manual as a downloadable file or a printed copy for purchase. Online forums dedicated to welding and equipment maintenance are another potential source.

Users often share manuals and other helpful documents within these communities. If all else fails, contacting Hobart directly through their customer service channels is recommended. They can provide you with a digital or printed copy of the manual. Ensure you have your model and serial number handy to expedite the process and receive the correct manual version.

Contacting Hobart for Support

When facing challenges with your Hobart Champion Elite 225, or needing clarification beyond the manual, reaching out to Hobart’s support team is a valuable step. Hobart provides multiple channels for customers to seek assistance. The most direct method is through their customer service phone line. You can find the appropriate phone number on the Hobart Welders website under the “Contact Us” section;

Alternatively, Hobart offers online support through their website. This may include a contact form for submitting inquiries, a live chat feature for immediate assistance, or a comprehensive FAQ section addressing common questions and issues. When contacting Hobart, be prepared to provide specific details about your Champion Elite 225, including the model number, serial number, and a clear description of the problem you’re experiencing.

Photographs or videos of the issue can also be helpful in diagnosing the problem remotely. Before contacting support, review the troubleshooting section of the manual to ensure the issue is not easily resolvable. Hobart’s support team can assist with technical issues, warranty claims, parts inquiries, and general product information. They are dedicated to ensuring customer satisfaction and providing the necessary guidance for optimal performance of your Hobart equipment.